I’m thrilled to share the transformation of this vintage step stool, which has been given new life through a stunning buffalo check makeover. The end result is nothing short of breathtaking, and I couldn’t be more pleased with how it’s turned out. With just a dash of love and paint, this once- ordinary piece has been elevated to bring a charming vintage touch to my porch, where it will surely become a focal point.
Be Sure to PIN this for Later!
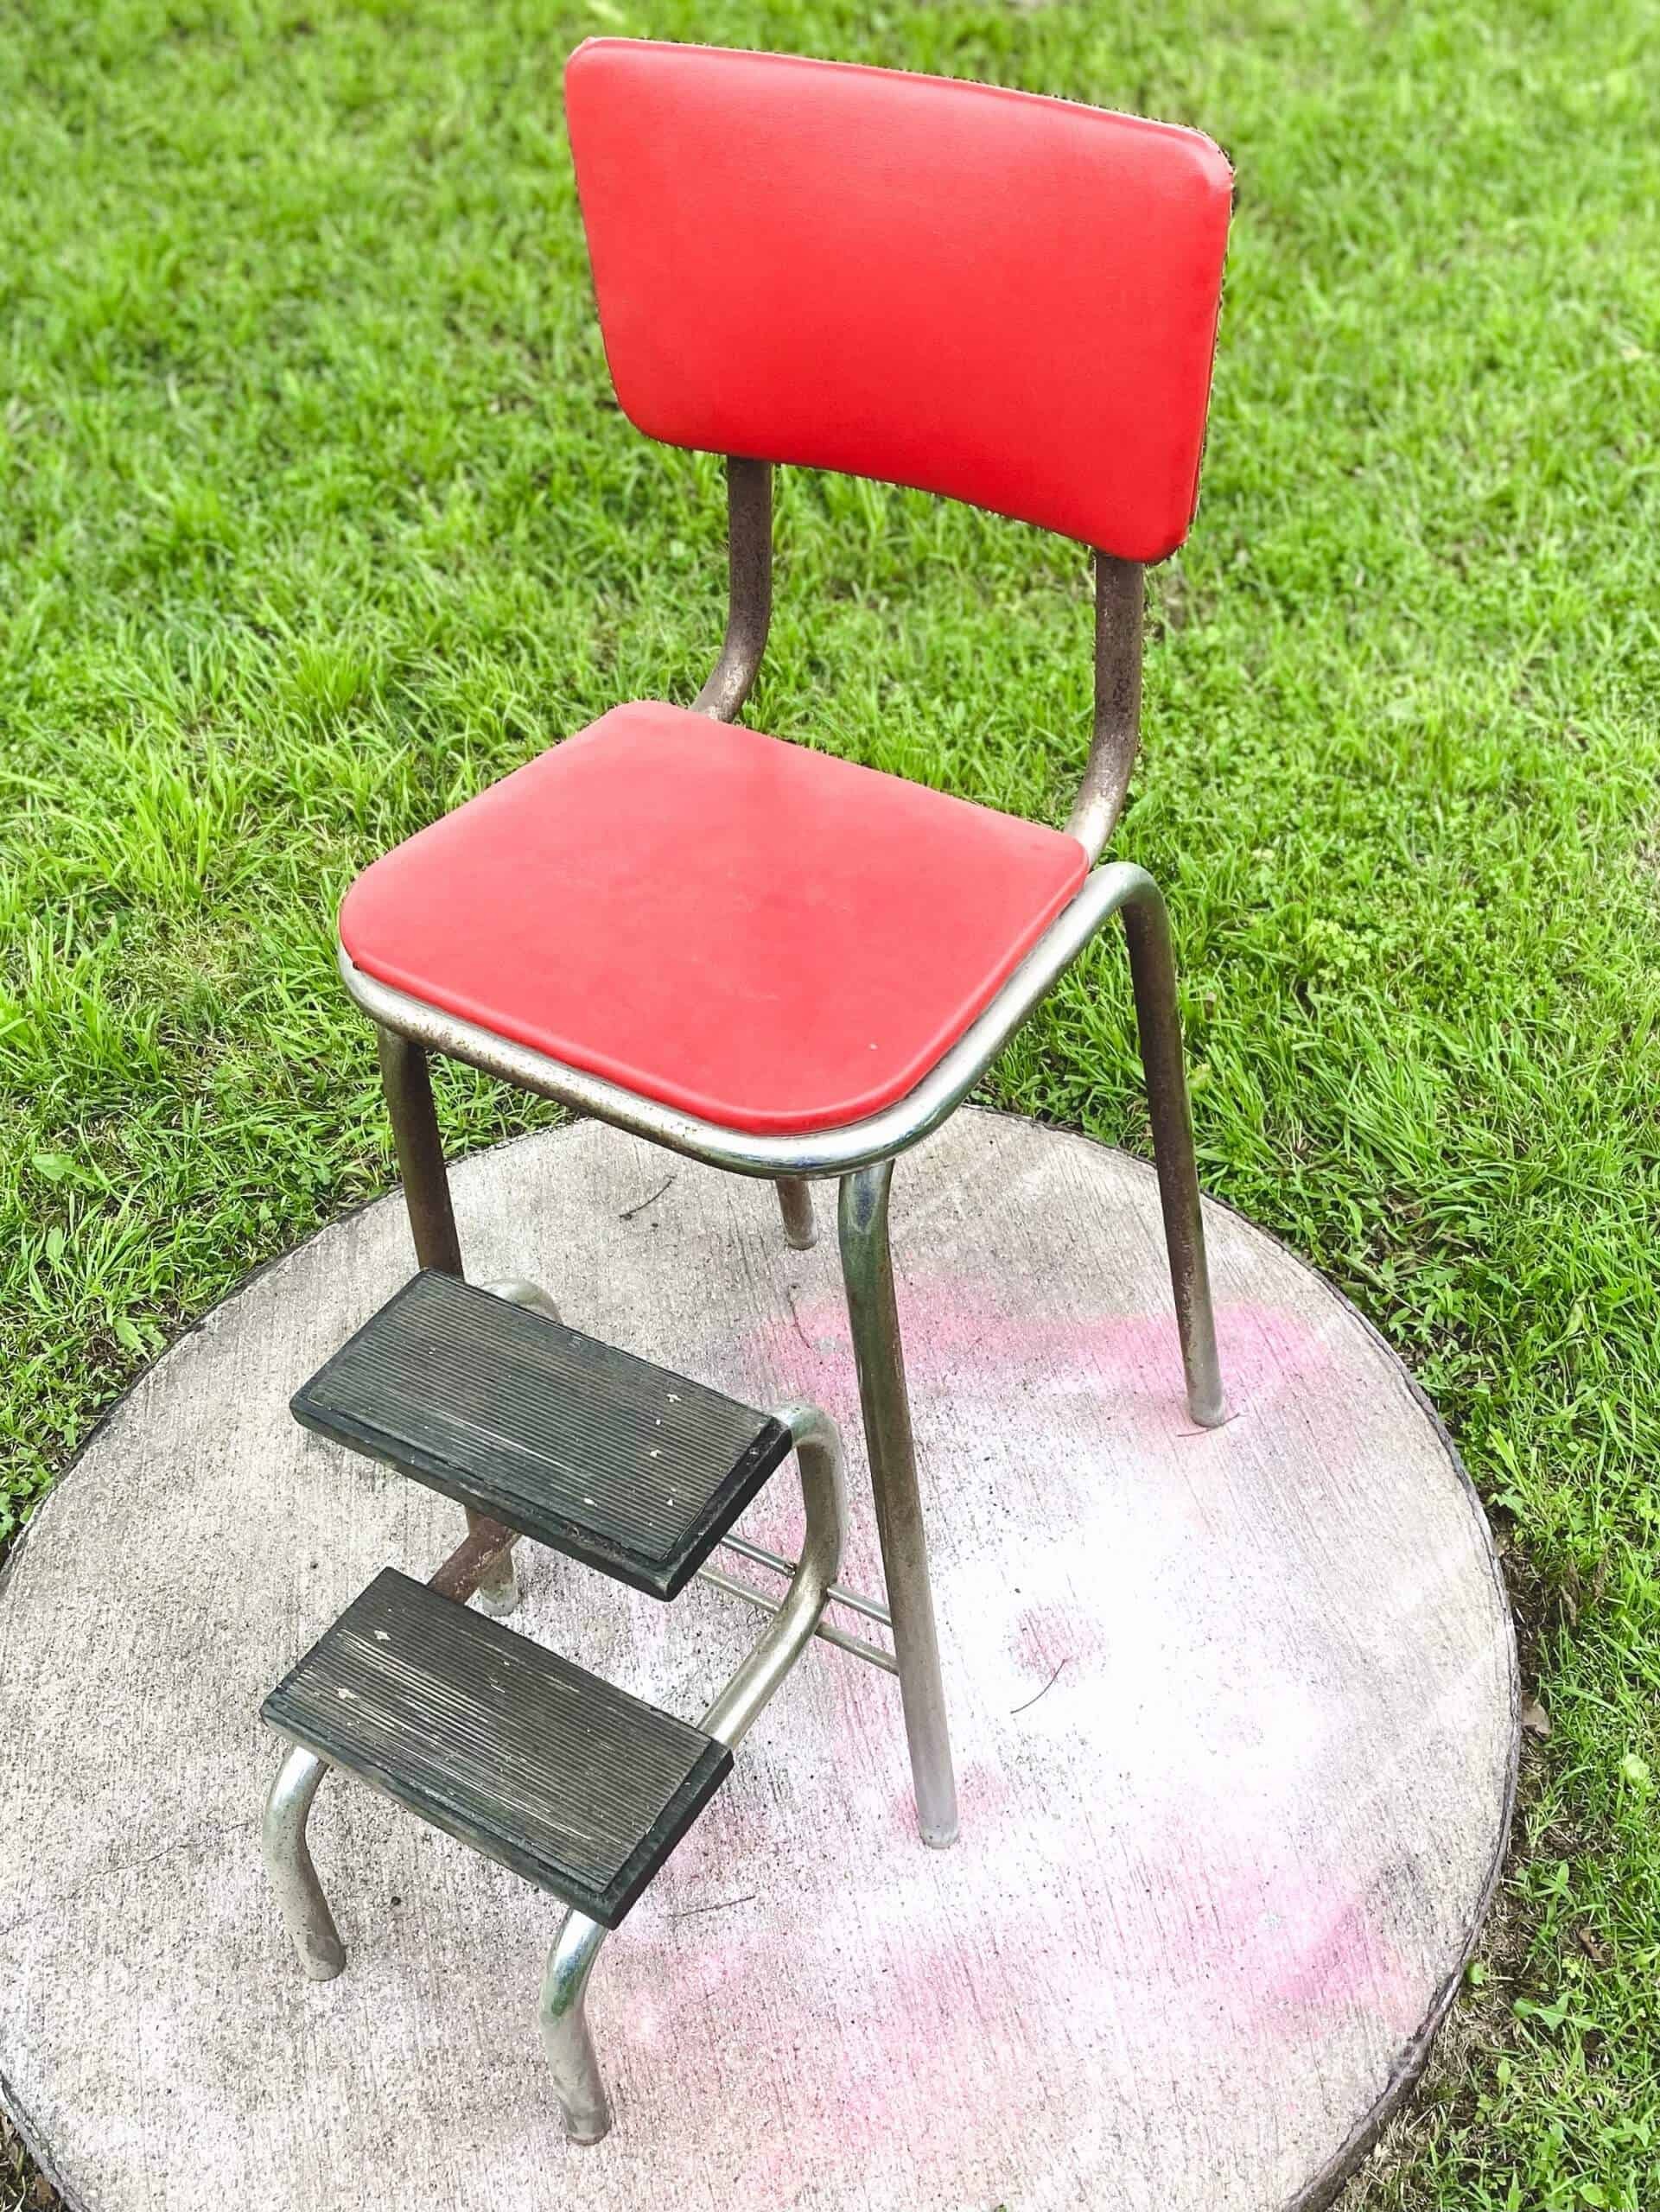
Buffalo check is a beloved motif for me, and I’ve had the pleasure of sharing several projects featuring this iconic print. Who could forget the stunning buffalo check headboard makeover or my comprehensive post on buffalo check decor trends? As soon as I laid eyes on this vintage armchair, I knew it would be perfect in black and white. While the red seat was in decent condition, it simply didn’t mesh with any of my existing decor.
I firmly believe in giving old items a new lease on life, which is exactly what we’ll do in this tutorial.
WHAT YOU’LL NEED TO MAKE a Vintage Step Stool Makeover
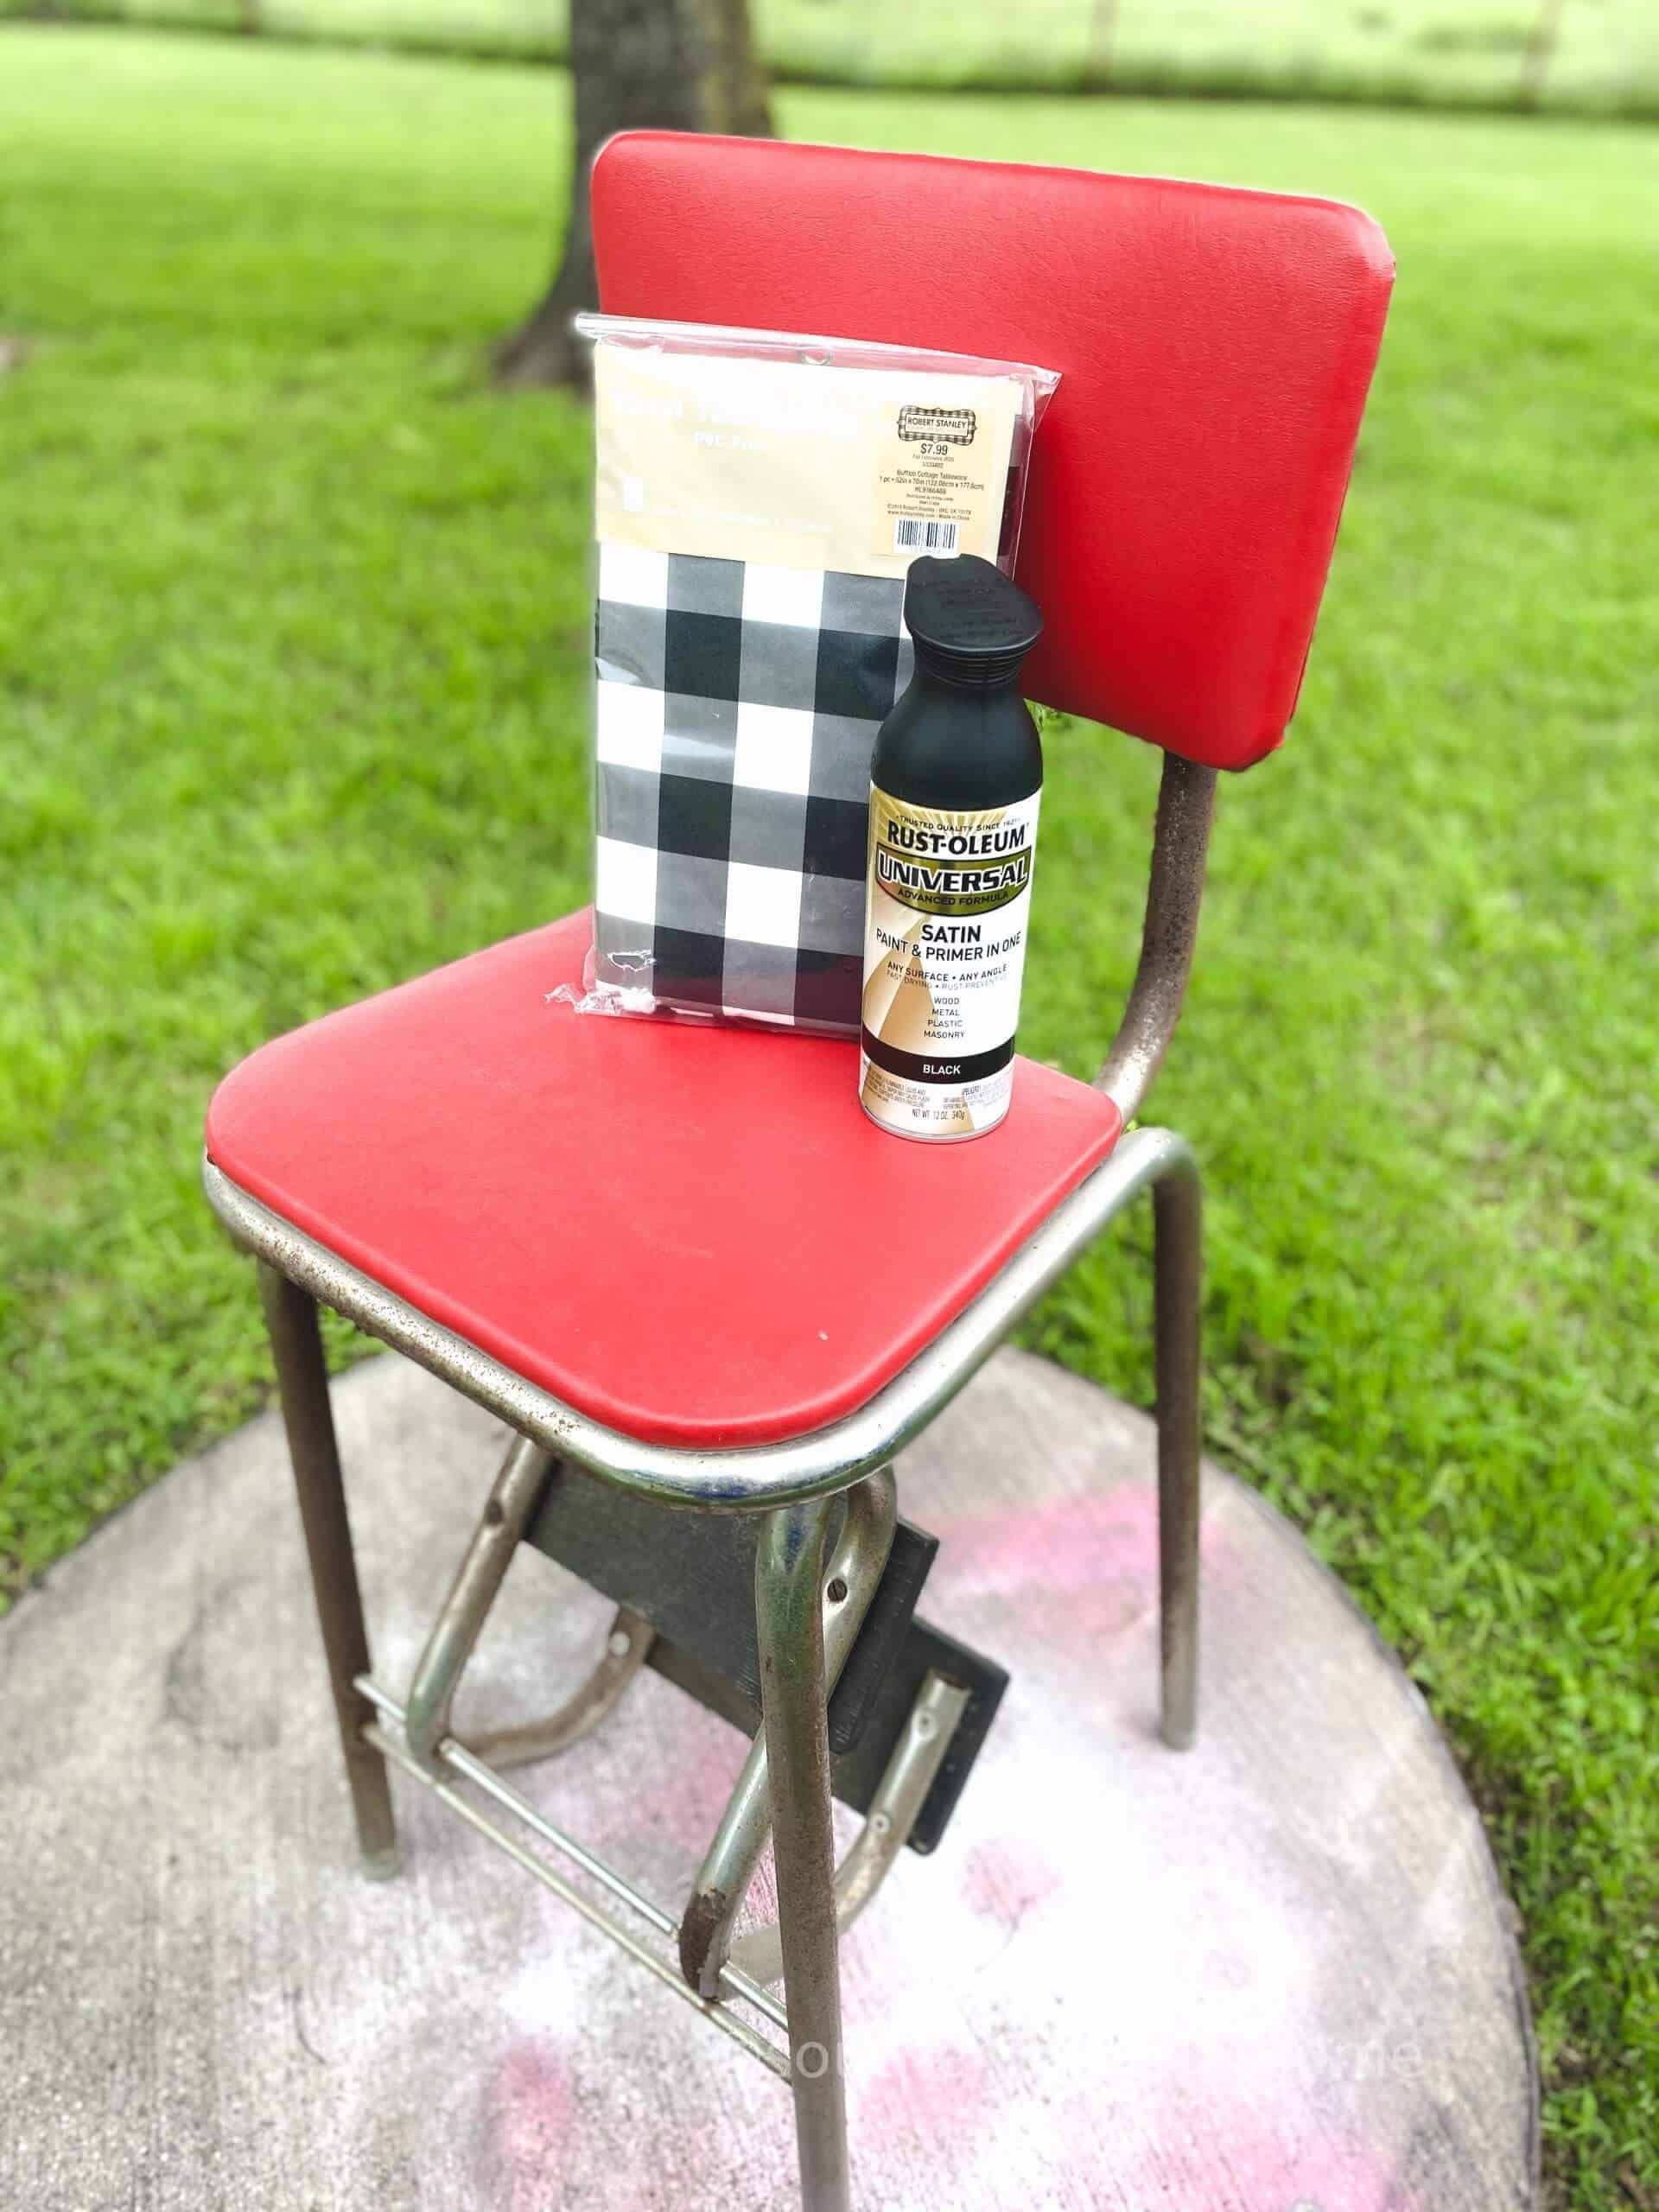
To give your vintage stool a unique makeover, you’ll need some essential materials. First, head to Cricut Design Space where you can download a free SVG file specifically designed for cutting vinyl with your Cricut machine. Next, grab some Buffalo Plaid Vinyl Tablecloth to add a touch of rustic charm. For the paint job, Rustoleum Satin Paint & Primer is a great choice. Make sure to clean your stool thoroughly before painting by using Liquid TSP Cleaner and some gloves to protect your hands.
Once you’re ready to start painting, use a small paint brush to get into those tight spaces. Finally, don’t forget a staple gun for any additional embellishments or decorations.
HOW TO MAKE A Vintage Step Stool Makeover
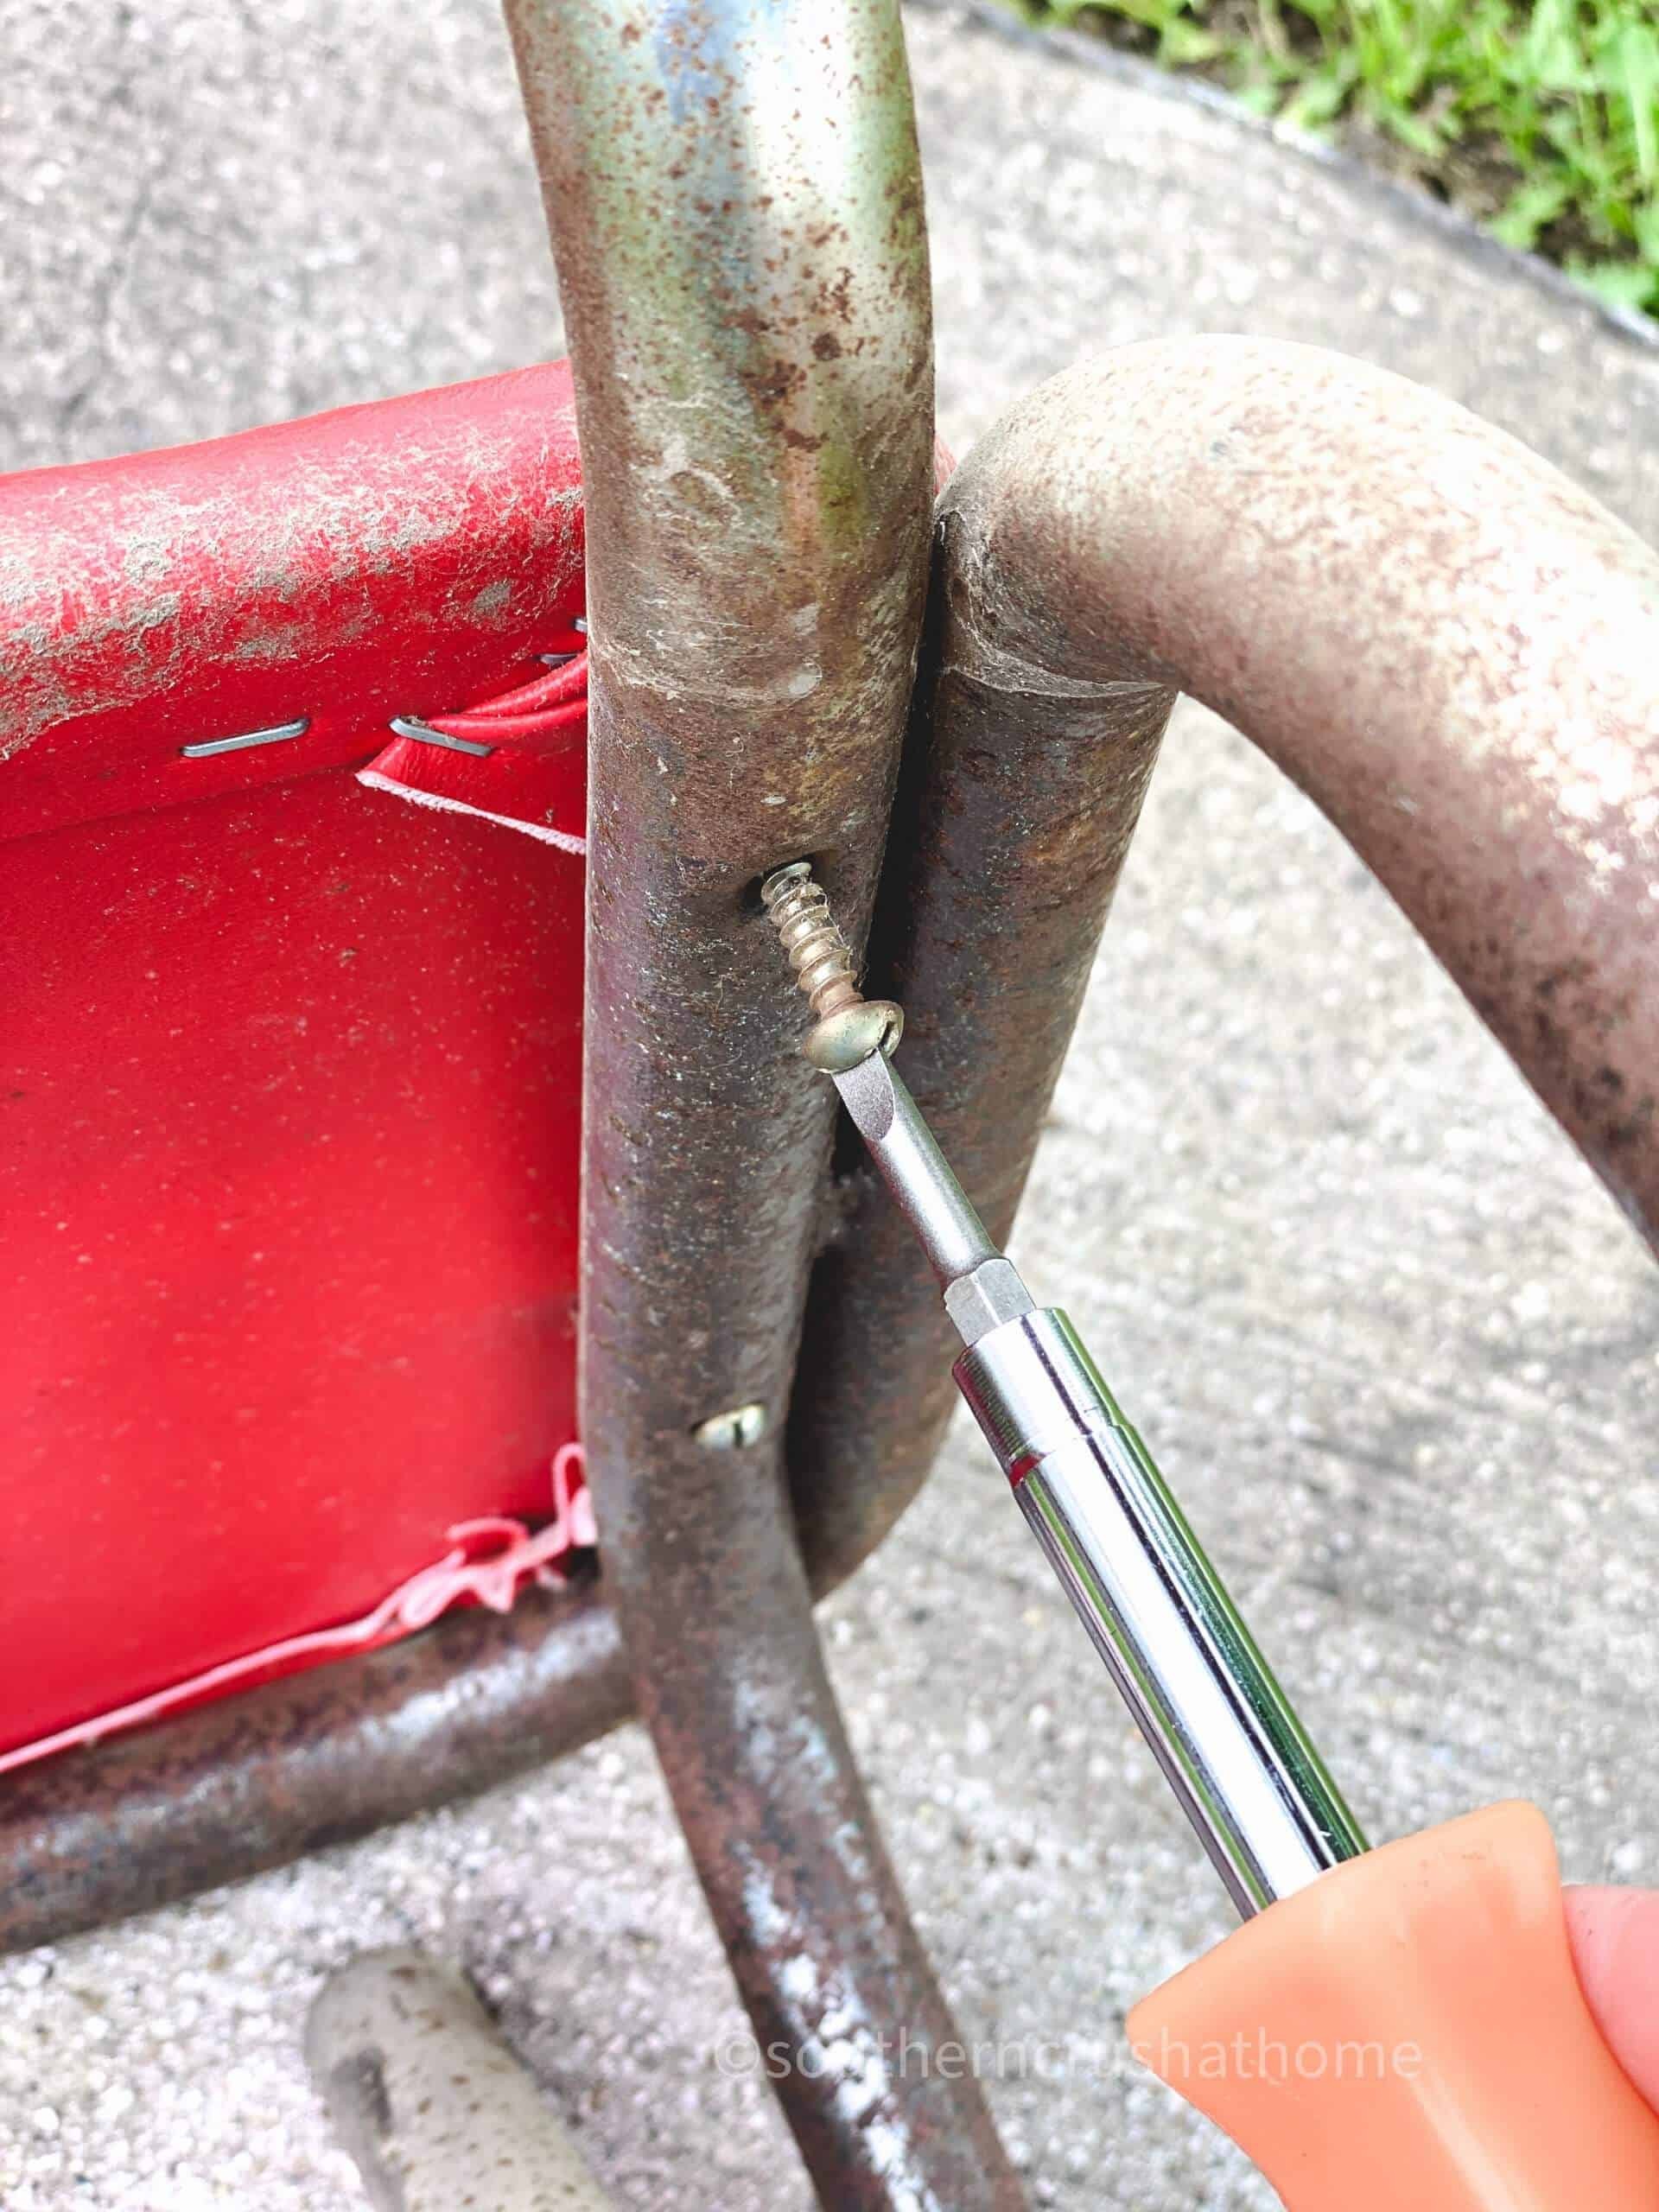
To refinish the chair, start by removing the screws from the seat and taking out the seat altogether. Set it aside for now. Before proceeding with the refinishing process, take the opportunity to give the chair a thorough cleaning. I personally prefer using Liquid TSP Cleaner for this step. Alternatively, you could choose to paint the entire seat and chair frame instead of removing the top as is typically done. This was my approach in the following live video demonstration.
When working with spray paint, it’s essential to wear gloves to prevent clogs from forming on your hands. Make sure to apply the paint in light, even strokes in a well-ventilated area. Continue painting until the stool is evenly coated and let it dry completely.
NEXT…
With the chair now dry, attention turns to revamping the stool. To add a splash of personality, I opted for a vibrant vinyl buffalo plaid tablecloth from Hobby Lobby, which I purchased last year. Its water-resistant nature and pre-attached felt backing make it an ideal choice for outdoor use. The finished step stool will soon be taking pride of place on my porch, and I’m eager to get the installation underway.
For additional tips on smart shopping at Hobby Lobby, be sure to explore my previous post featuring 7 easy ways to save.
Vintage Step Stool Makeover
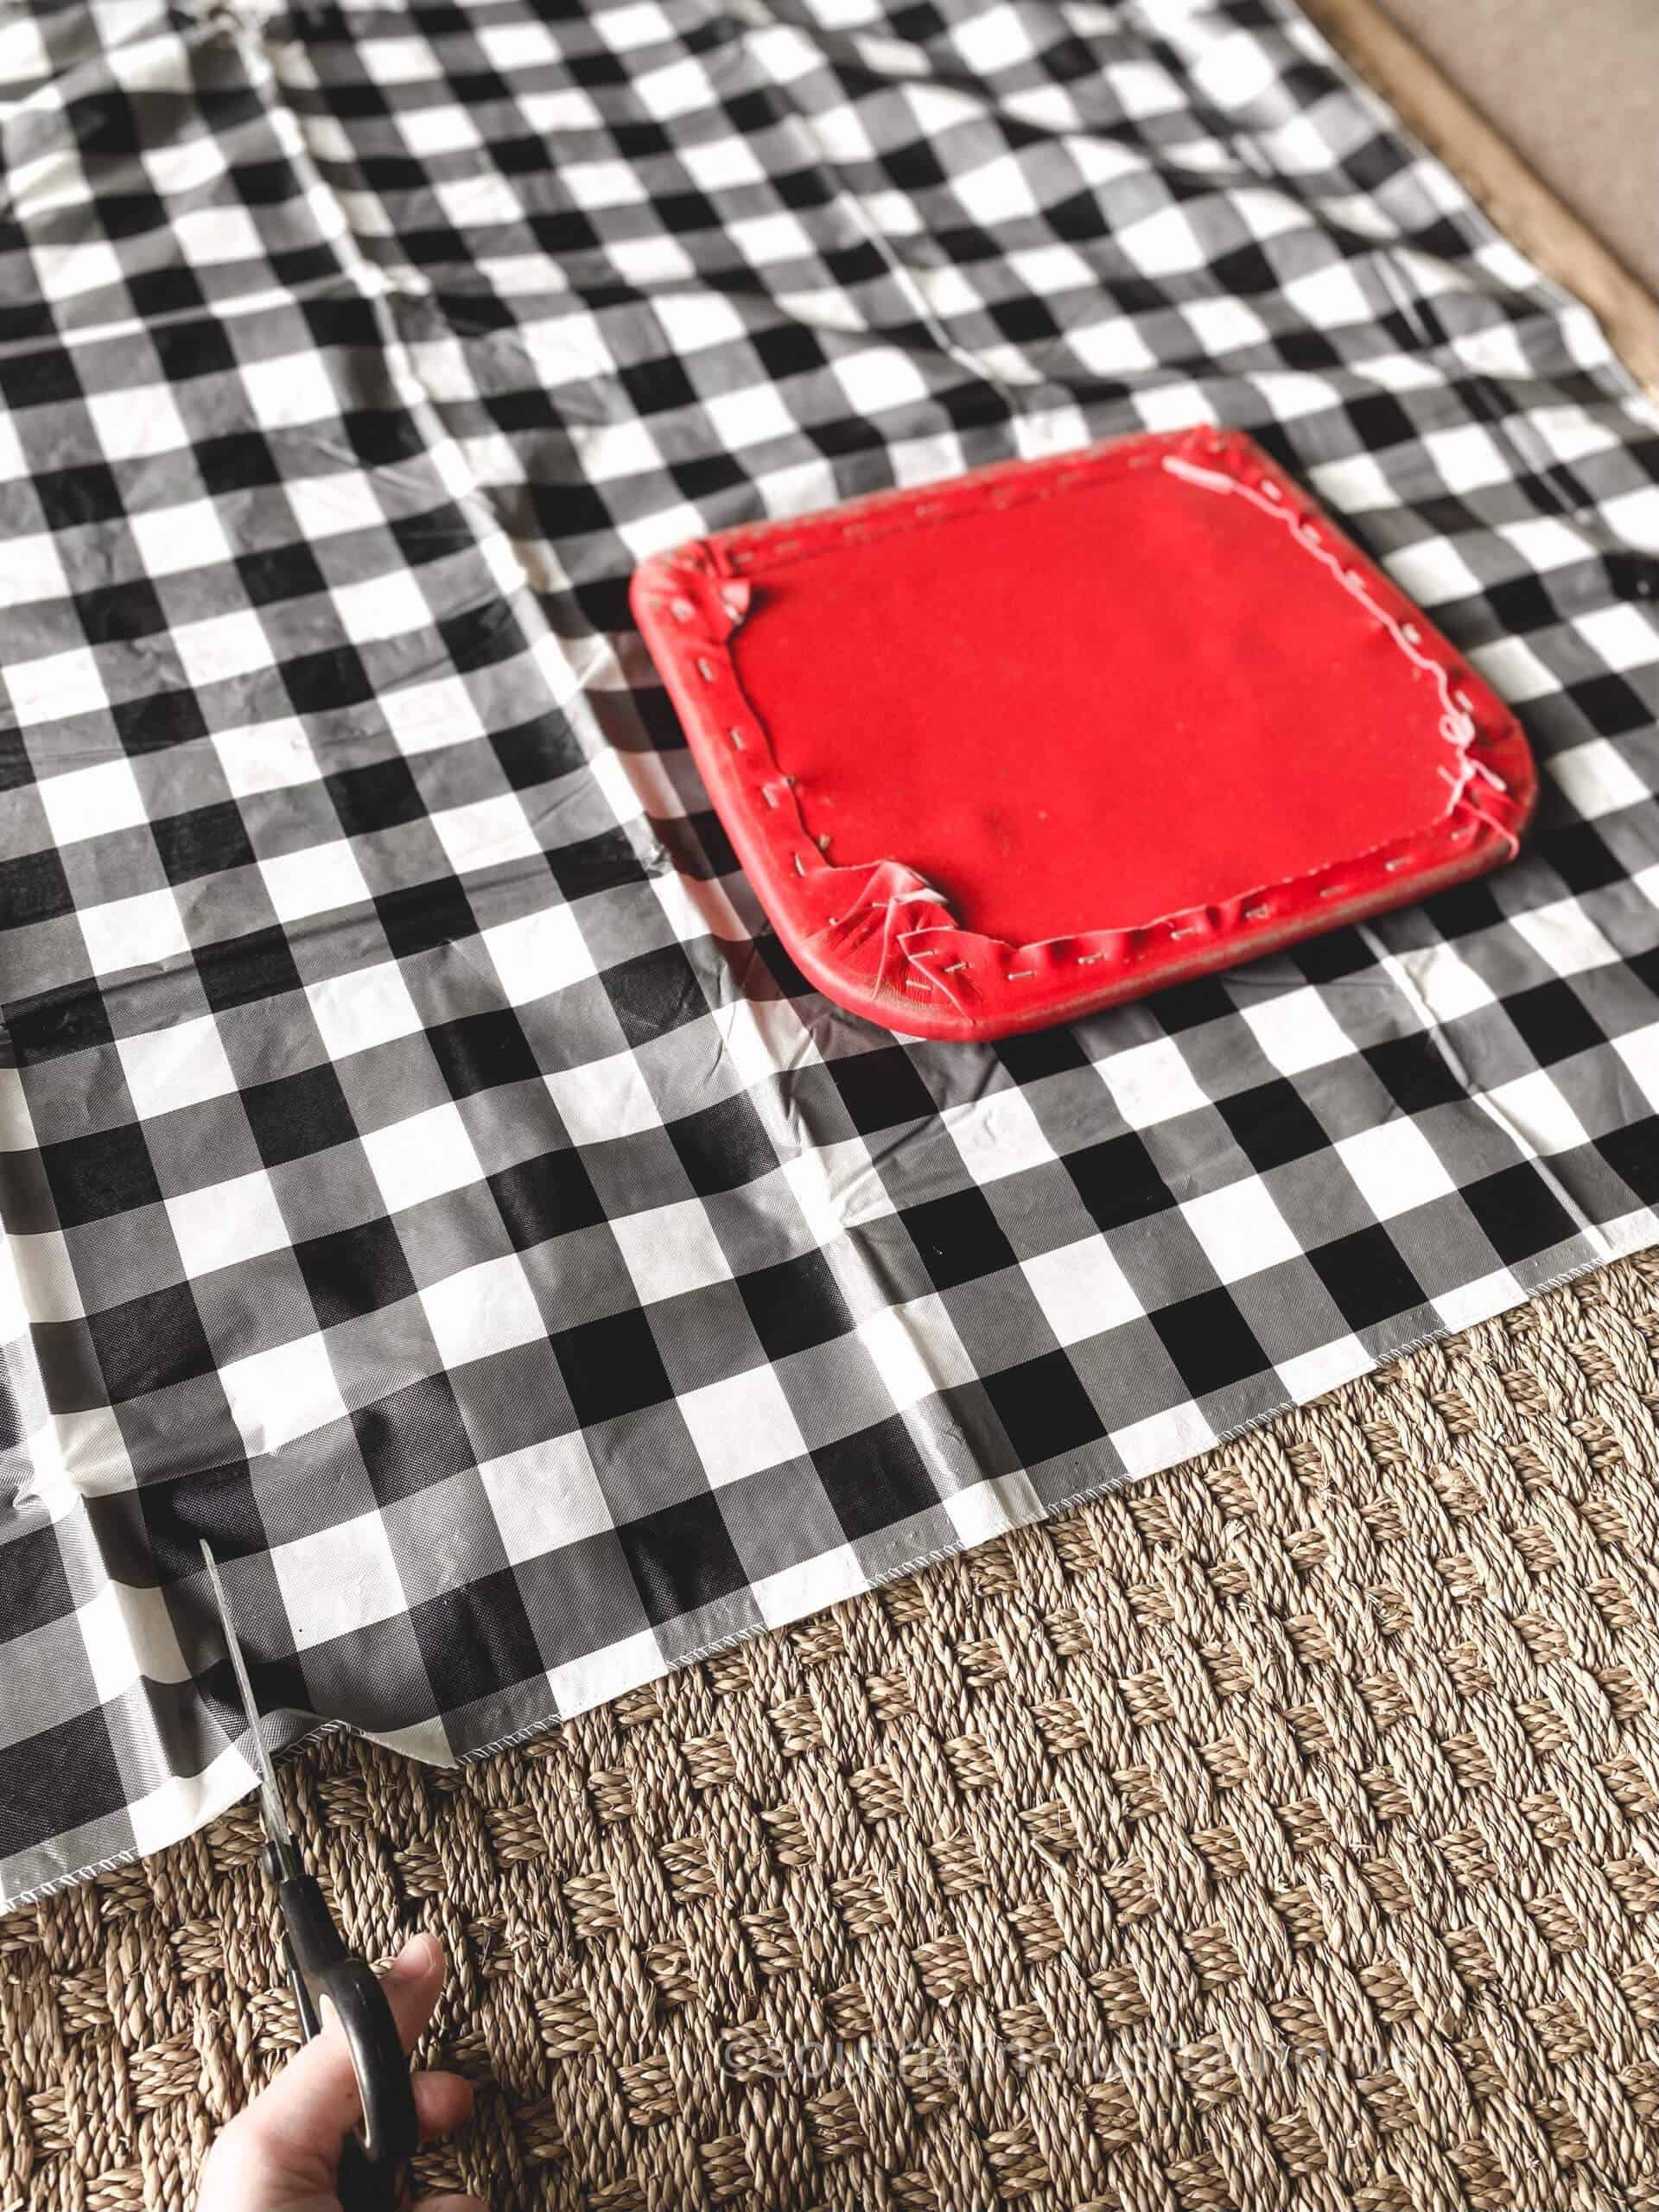

Place the chair on top of the buffalo check tablecloth. Ensure a snug fit by cutting around it with fabric scissors, leaving enough room to secure the fabric to the seat. For a seamless finish, cut carefully to accommodate any necessary adjustments. Next, utilize your staple gun to fasten the fabric in place, pulling it taut for an even coverage. This will provide a sturdy base for your newly refurbished vintage step stool.
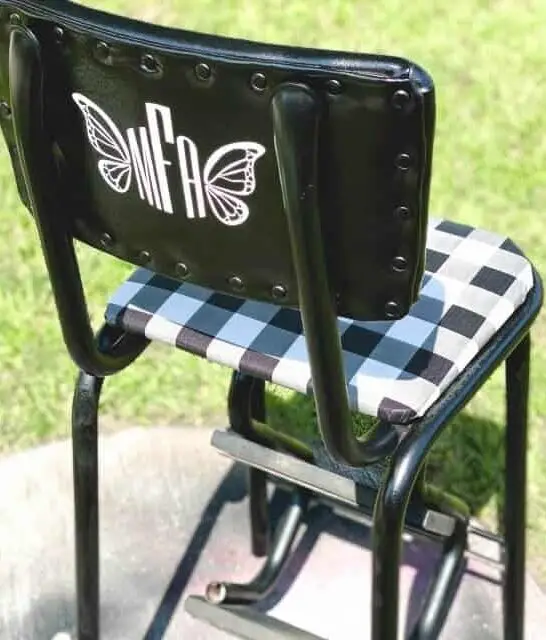
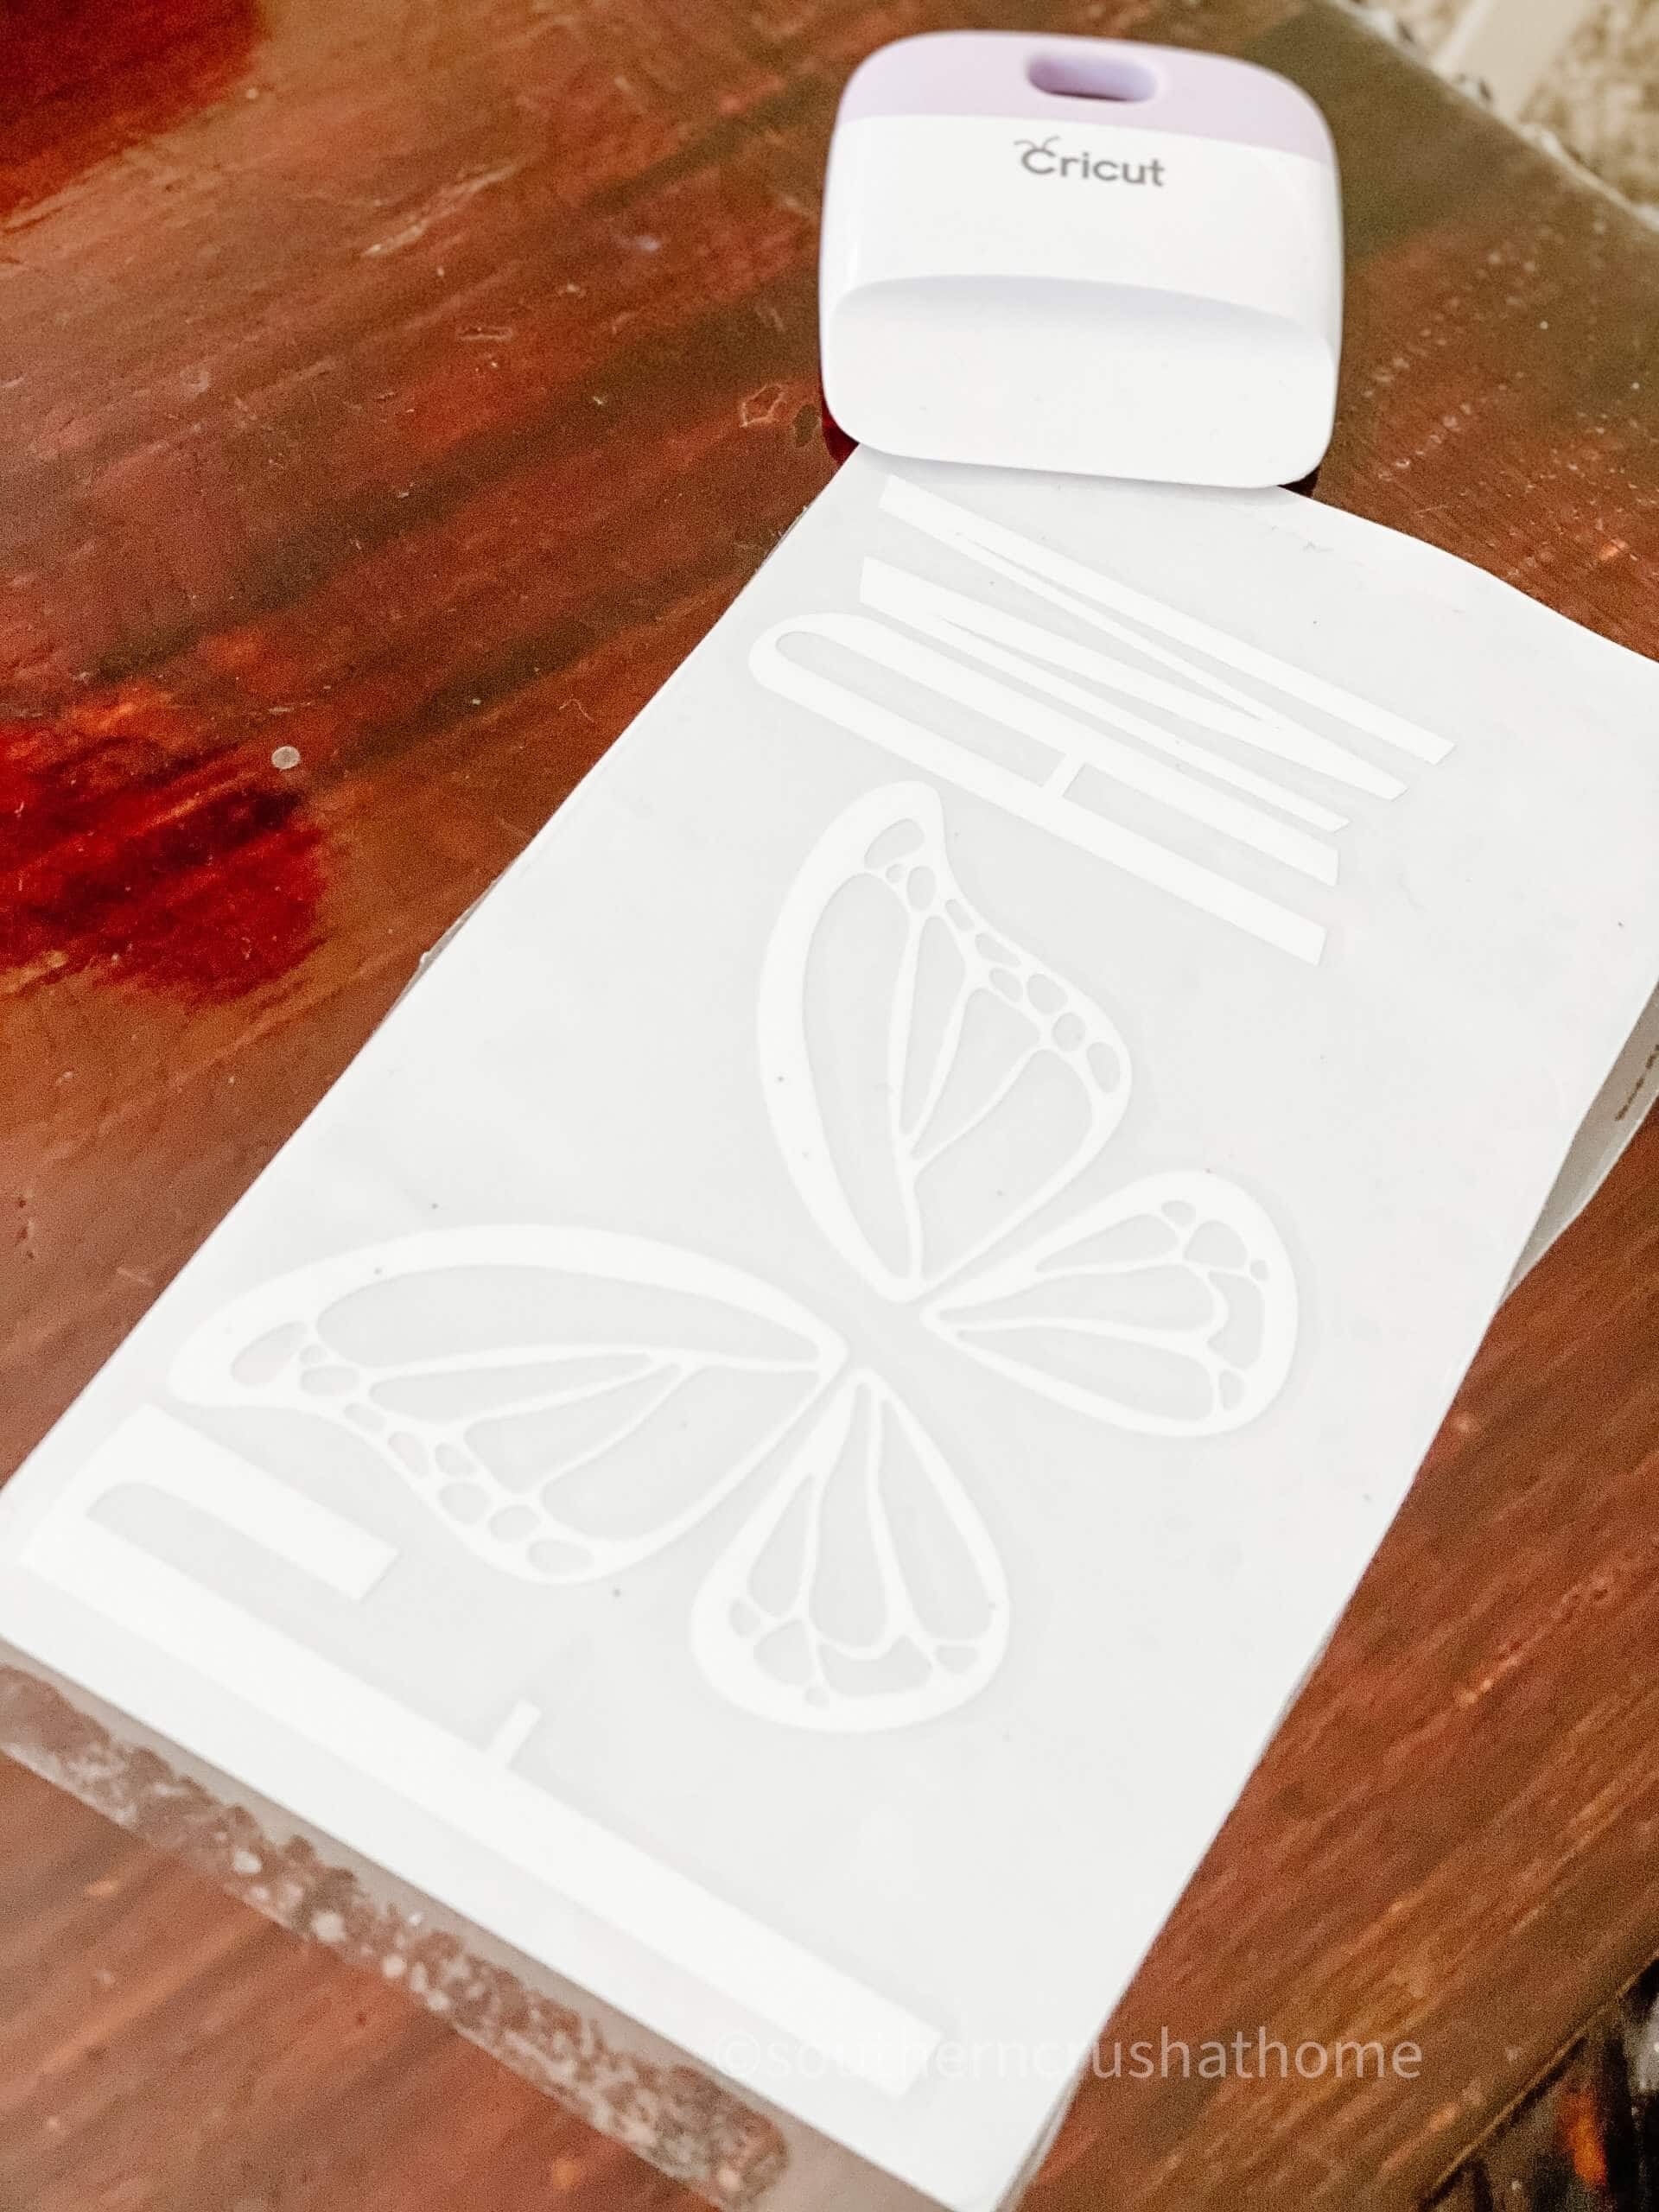
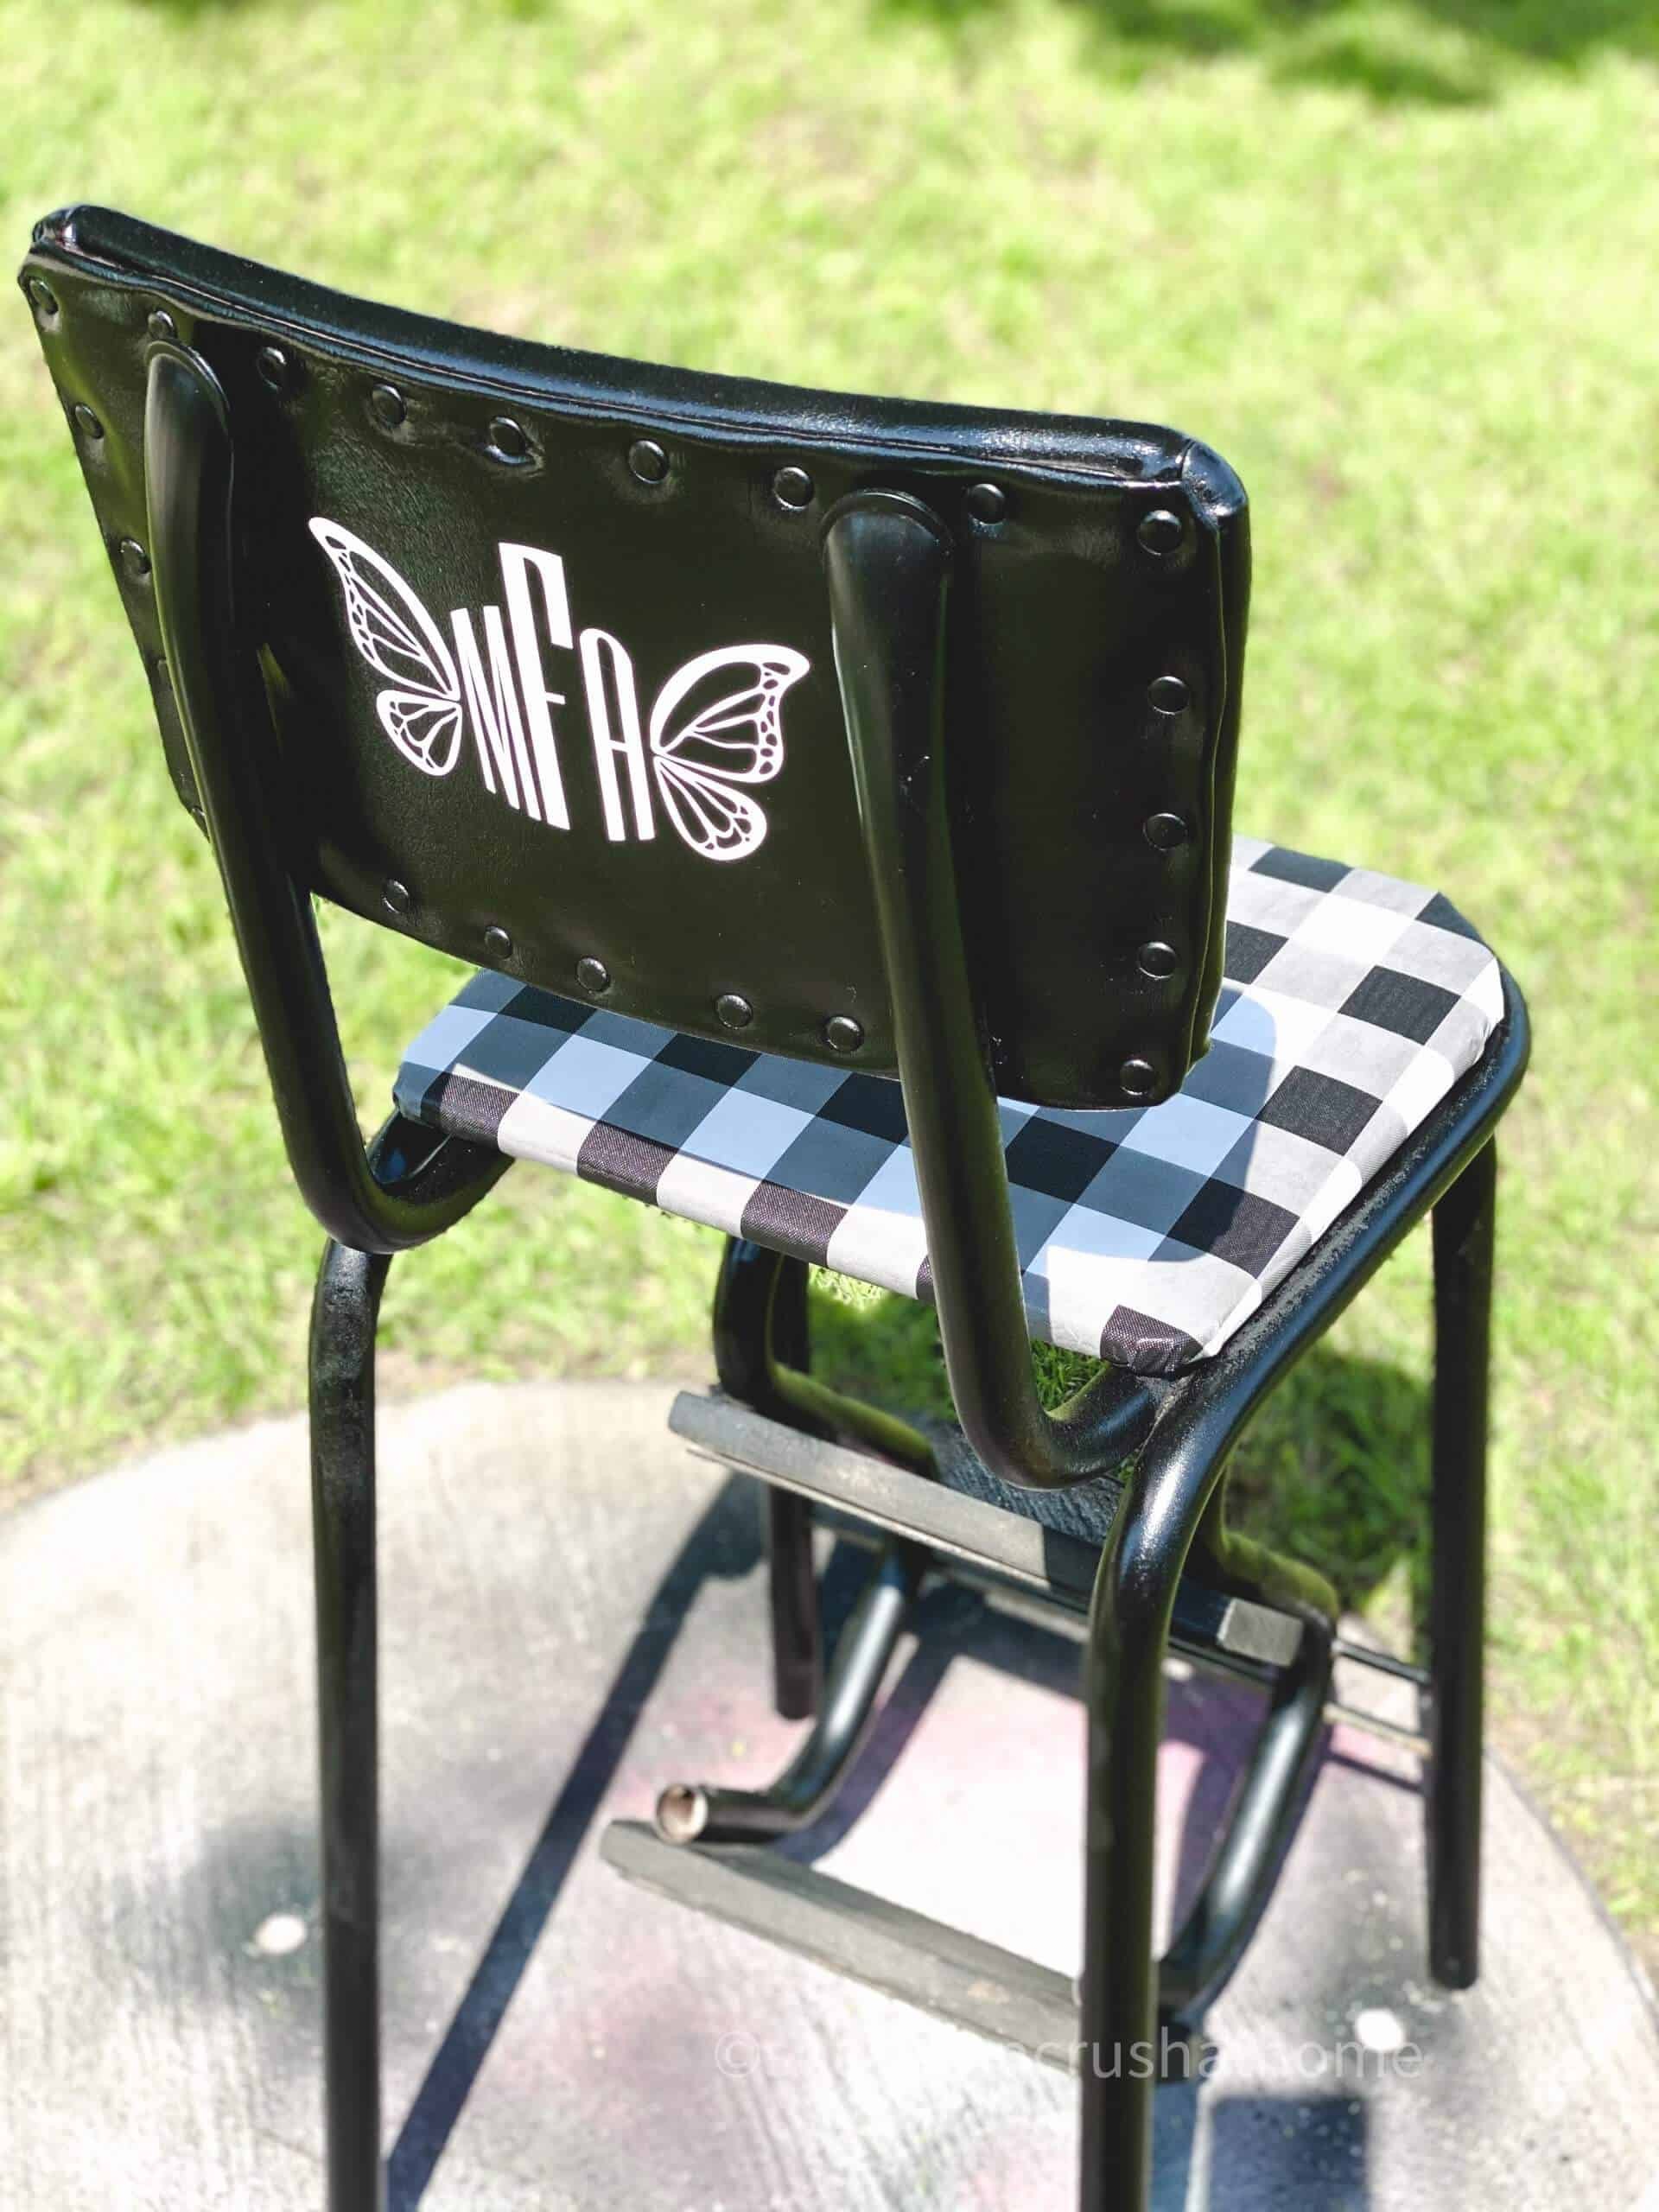
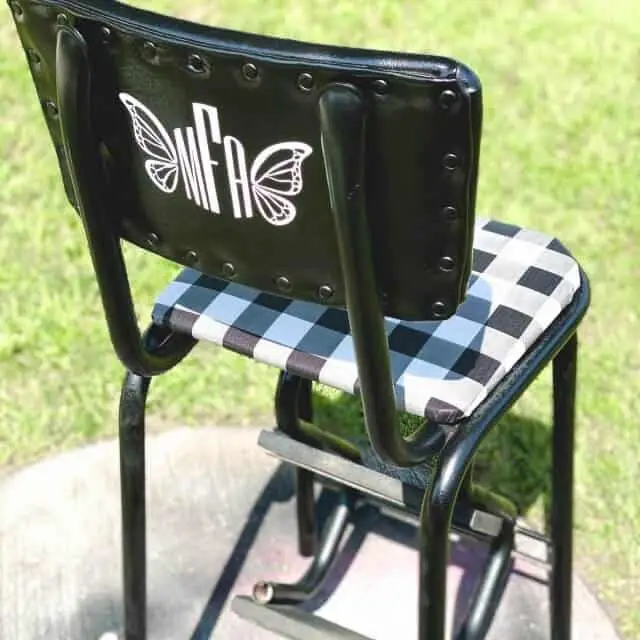
With plenty of buffalo check remaining, you can repurpose it for another creative project – a wonderful bonus! The addition of a charming butterfly monogram on the back of the seat takes this already stunning piece to new heights. To apply the monogram, simply cut out the vinyl and secure it using a scraper, which proves surprisingly effective. The crisp white accent against the black buffalo check creates a striking visual contrast that beautifully complements the overall design.
The tiny transfer adds an adorable touch, elevating the entire project. Finally, reattach the seat back to the stool and admire your handiwork – a beautiful vintage step stool that exudes charm and character.
that’s it!
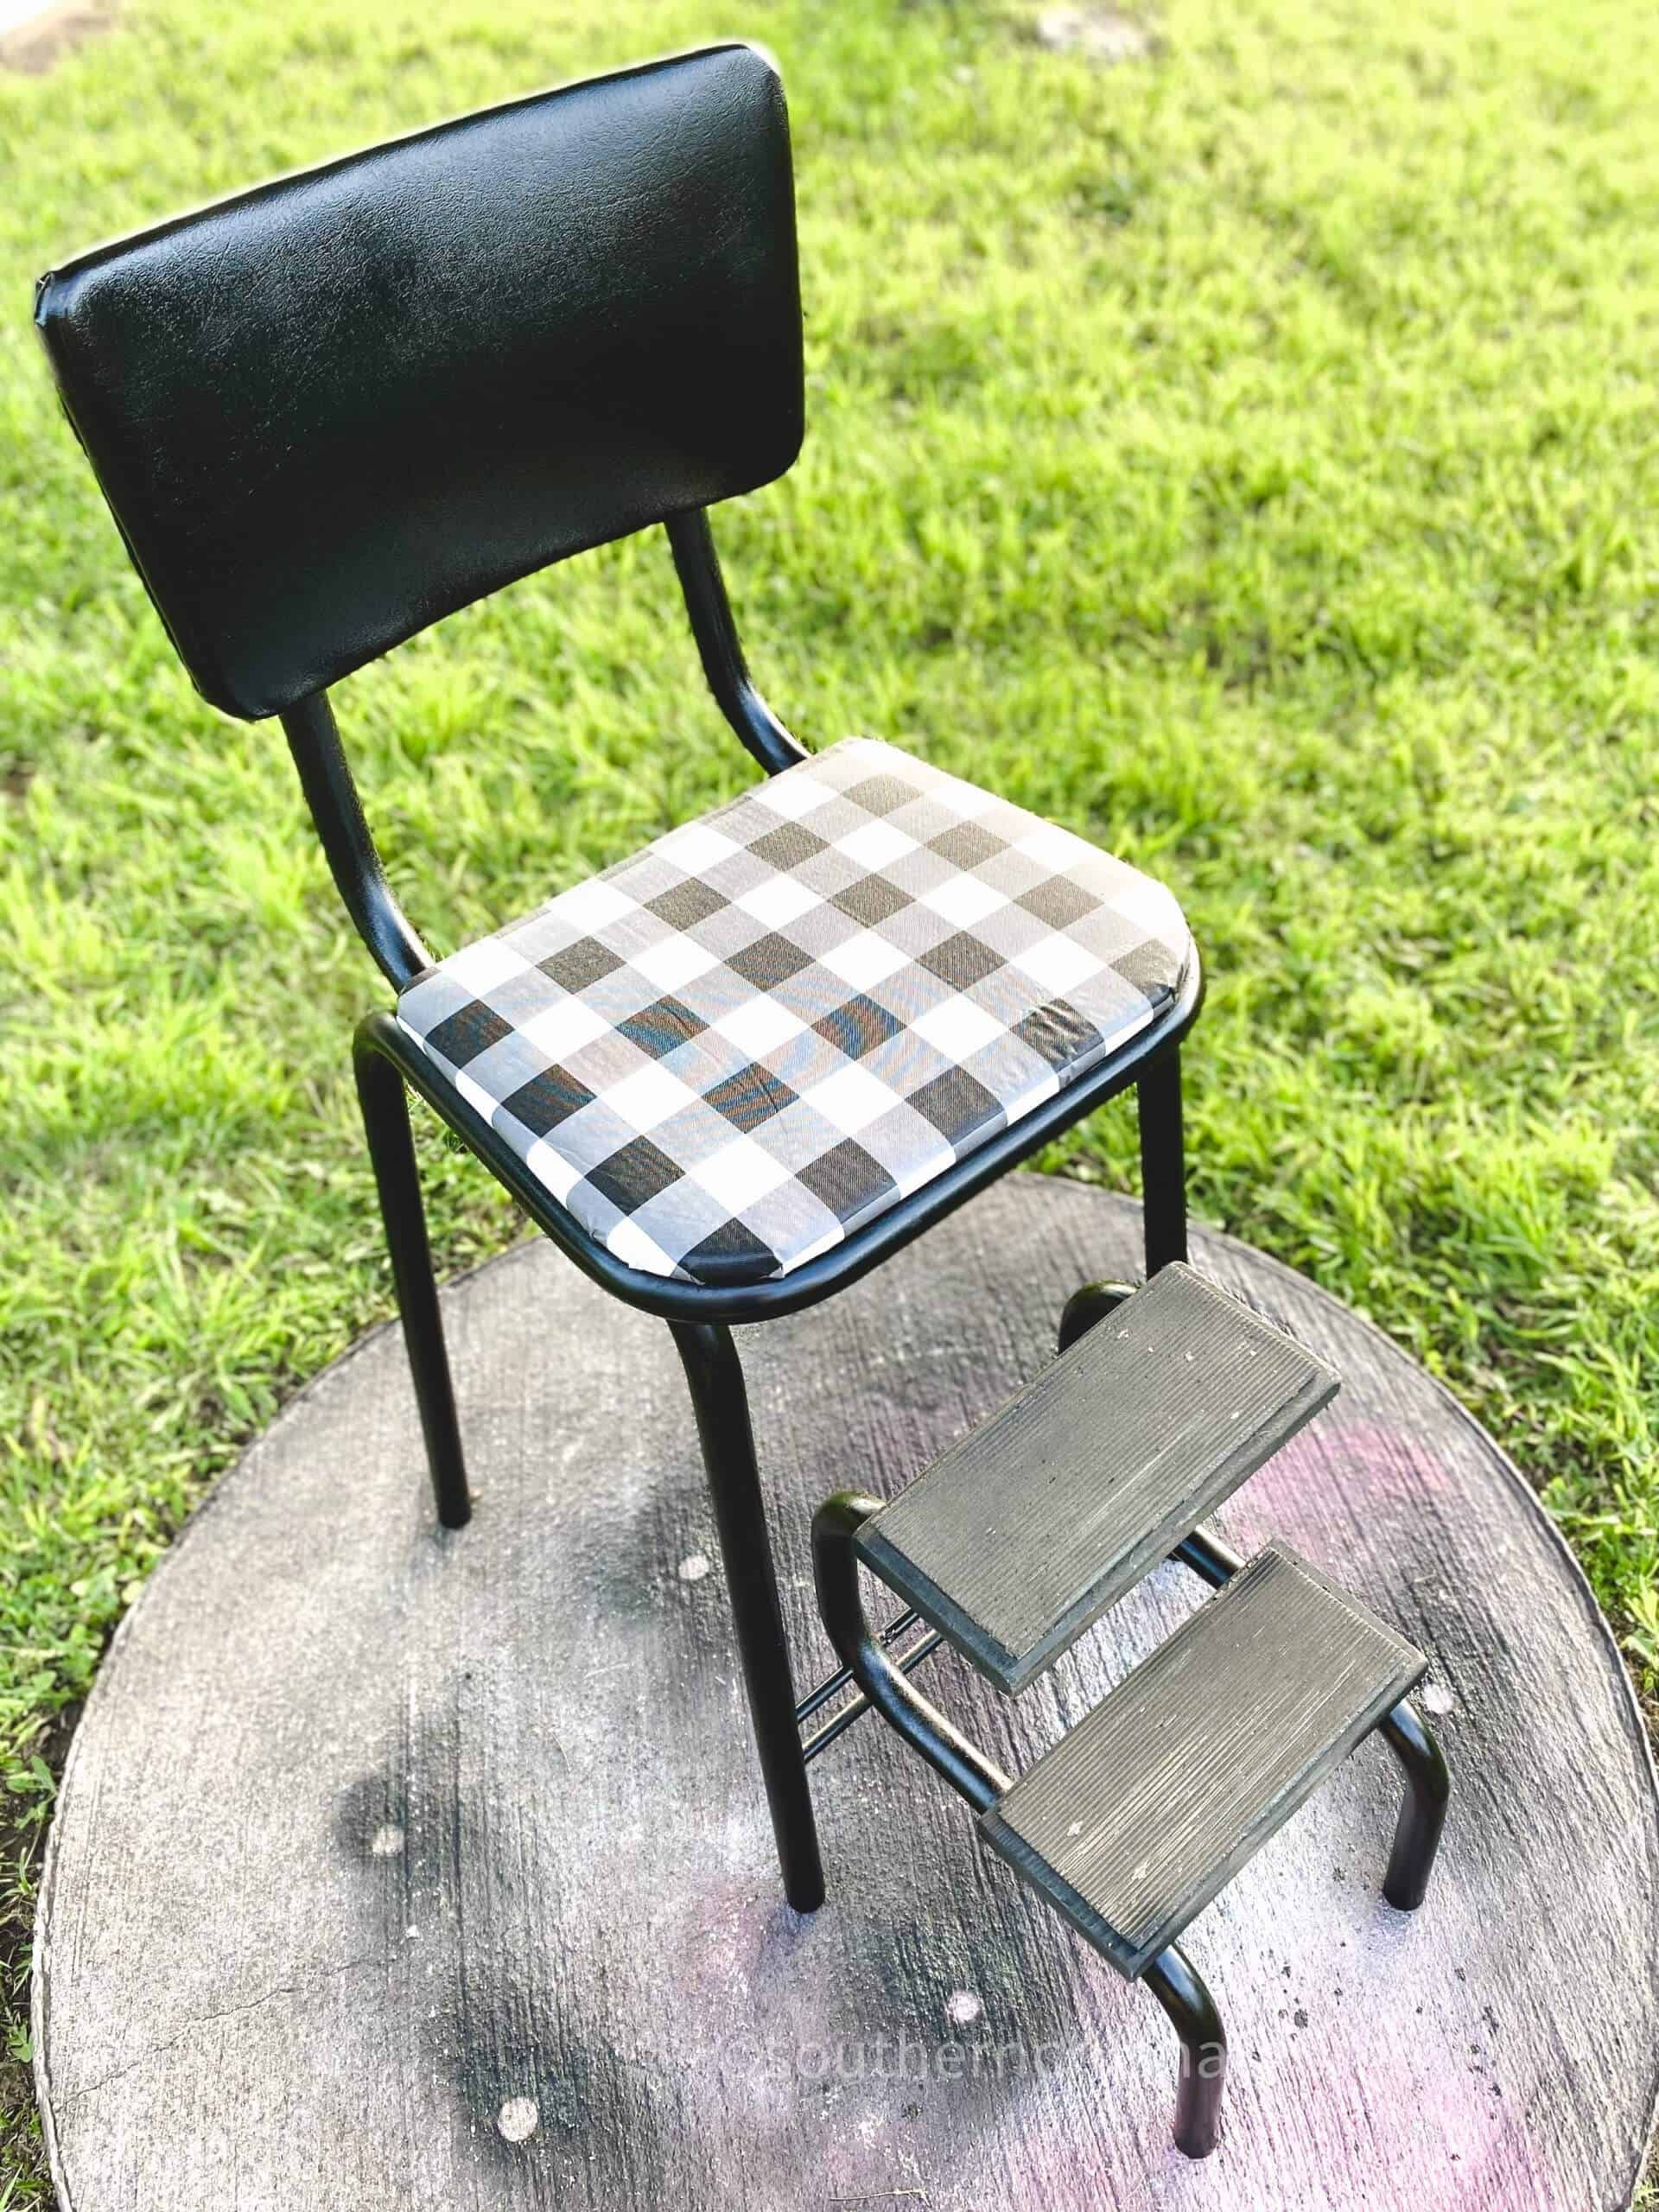
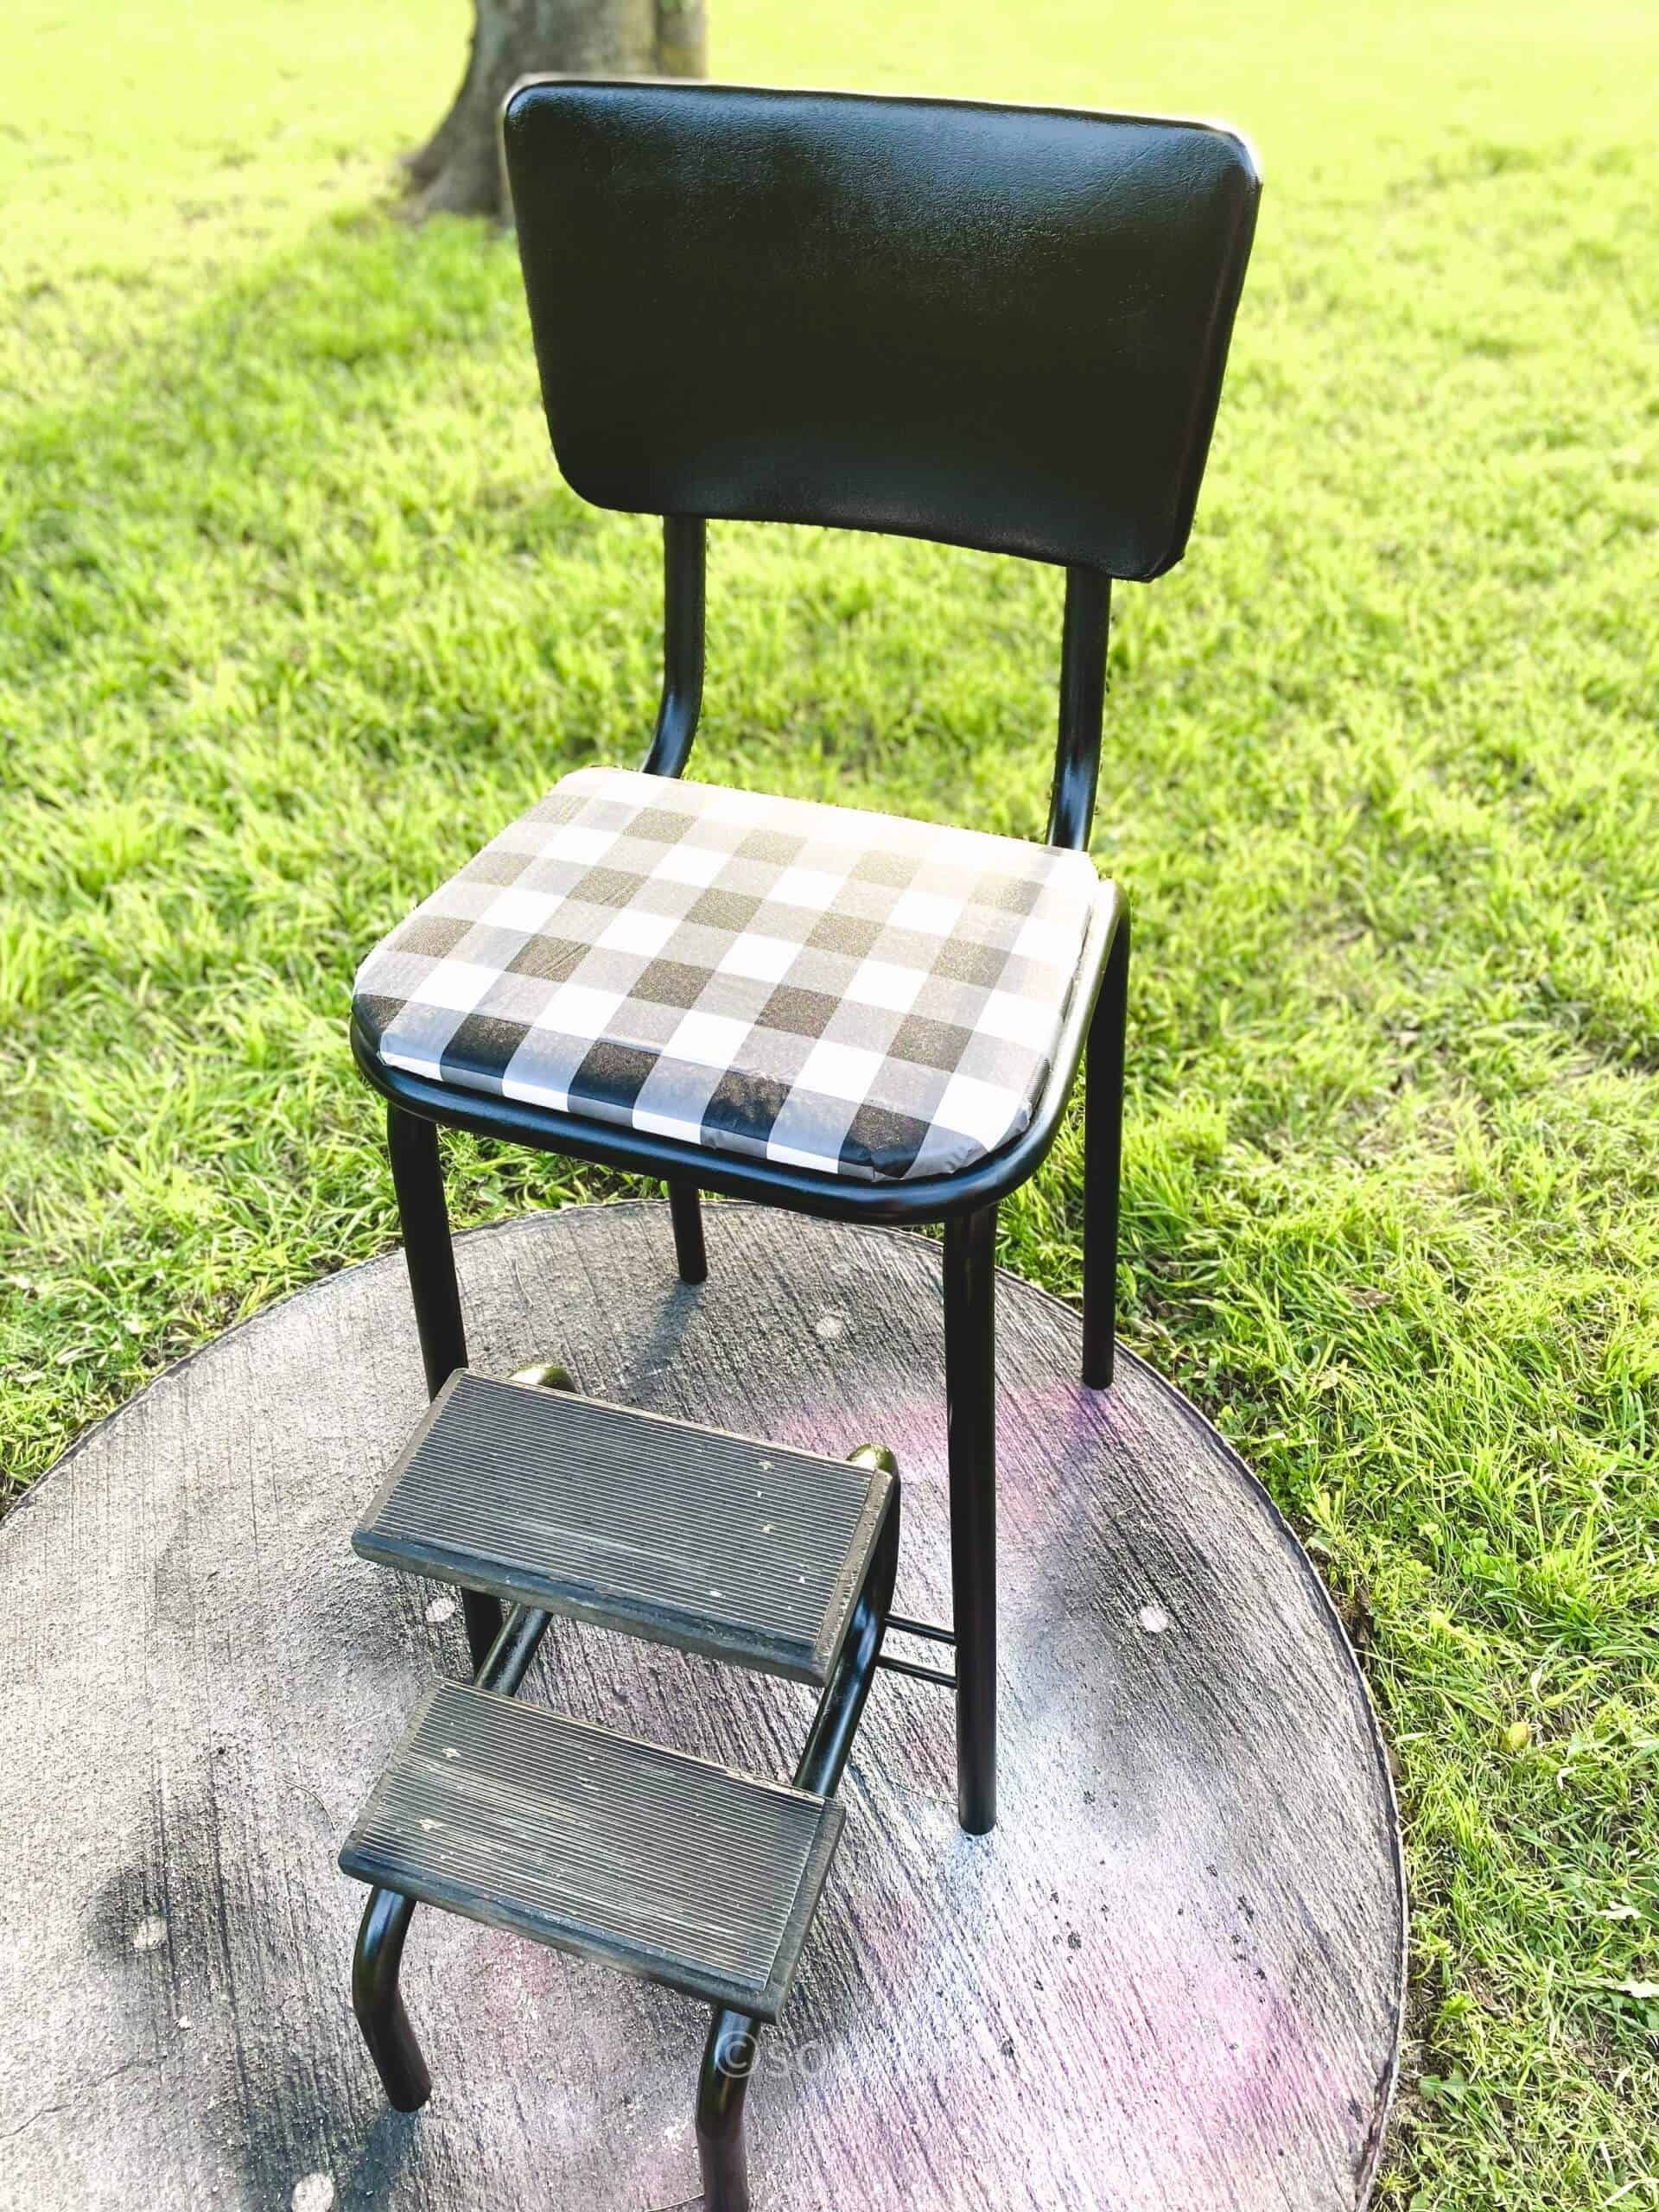
The painted vinyl project turned out wonderfully, with a beautiful contrast between the solid black and the black and white check design. I’m thrilled with the simplicity of the process, aside from the minor issue with the spray paint clogging. The finished product has opened up a world of possibilities for me – now I can easily reach high shelves or water my hanging plants without straining. Plus, it’s just visually appealing to have around.
If you’re looking for inspiration on how to repurpose a vintage stool, this project is definitely worth considering. How do you envision using this stool in your home?
BE SURE TO CHECK OUT THESE OTHER FARMHOUSE DIY ideas!
For those who appreciate the charm of a farmhouse-inspired home, there’s no shortage of delightful DIY projects that can be created using Dollar Tree items. Take, for instance, the farmhouse wreath, which can instantly add a touch of rustic elegance to any room. Moreover, a handmade kitchen scale with a farmhouse flair is an ingenious way to bring some old-fashioned charm into your cooking routine.
And when it comes to showcasing cherished memories, a customized photo frame in a vintage farmhouse style is the perfect keepsake. These Dollar Tree DIY projects are not only budget-friendly but also remarkably easy to make, making them a must-try for anyone looking to add a dash of farmhouse magic to their living space.
Vintage Step Stool Makeover
With a keen eye for design, I transformed an endearing vintage step stool into a one-of-a-kind masterpiece. A coat of fresh paint added a pop of color, while the incorporation of a charming buffalo check tablecloth brought a touch of rustic charm. The pièce de résistance was the addition of a beautiful Cricut-designed svg, which added a dash of elegance and whimsy to the overall aesthetic.
Equipment
Materials
When it comes to creating a unique and vintage-inspired decor, one of the most essential elements is often overlooked – the humble stool. But with the right design tools at your disposal, you can turn this simple piece of furniture into a stunning focal point in any room. In fact, Cricut’s Design Space offers a range of free SVG cut files that allow you to add custom designs and patterns to your vintage stool.
Whether you’re looking to add some Buffalo plaid flair or go for a more subtle, rustic look, these templates can help you achieve the perfect aesthetic. To get started, simply prime your stool with Rustoleum’s Satin Paint & Prime, then apply a vinyl tablecloth using Liquid TSP Cleaner and gloves. Finally, top it all off with a small paint brush to add any finishing touches. With these simple steps, you’ll be well on your way to creating a one-of-a-kind vintage stool that’s sure to impress.
Instructions
To give your chair a fresh new look, start by cleaning it thoroughly with TSP. Remove the chair seat and set it aside, taking note of the screws used to secure it. Next, put on some gloves and give the entire chair base and top back a coat of spray paint. Allow the paint to dry completely before moving on to the next step. Once the paint is dry, cut a piece of buffalo check tablecloth to fit the seat and attach it using your staple gun.
Then, reattach the seat with the same screws and screwdriver you used earlier. Finally, use a scraper to apply the vinyl monogram to the back of the top seat.