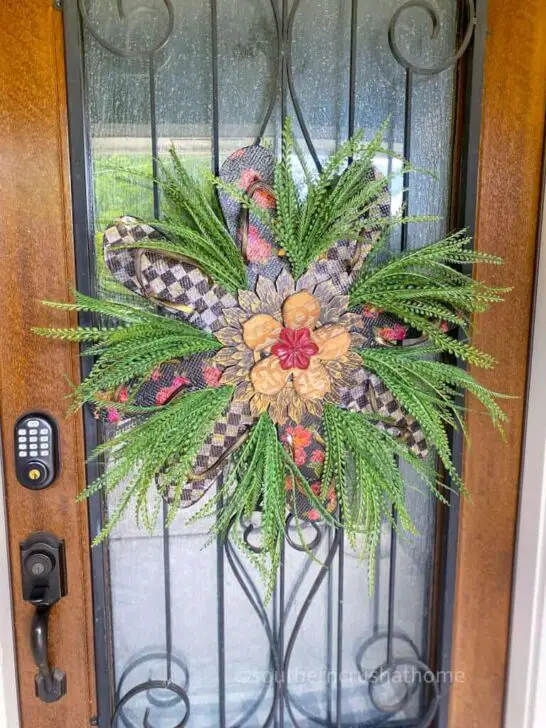
Summer is synonymous with flip-flops, but why not take it to the next level by crafting a flip-flop wreath that exudes your love for the season? This tutorial will guide you through the process of creating a stunning flip-flop wreath using tissue paper from MacKenzie Childs. As someone who’s passionate about making wreaths, I’m thrilled to share this project with you, which just might become your new favorite.
The adorable dollar store flip-flops and MacKenzie Childs tissue paper combine to create a beauty that’s not only easy to make but also a testament to the power of creativity. So, gather your supplies, get ready to be inspired, and let’s dive in! By the way, if you’re as fascinated by DIY projects as I am, be sure to check out my recent posts on the Flip Flop Pool Towel Rack and DIY Dresser Makeover for even more creative ideas.
Supplies Needed to Make a Flip Flop Wreath
To create a beautiful summer flip flop decoration, you can start by gathering some essential materials. Begin with the foundation – a foam wreath base, which can be found at a craft store or even thrifted from an old decoration. Next, grab some MacKenzie Childs tissue paper in your preferred color scheme to add a pop of color and texture to your design. Don’t forget the trusty tools: a pencil, scissors, hot glue gun, foam brush, and Mod Podge for securing everything in place.
For a natural touch, you’ll need some faux greenery, which can be shaped and molded to fit your desired design. To add a touch of elegance, use wood flowers or other natural embellishments to create visual interest. Finally, top it all off with gold and black mirror pieces from Dollar Tree for added glamour. If you want to get really creative, use glass plates to create unique shapes and textures. And don’t forget to have some wire cutters on hand to trim any excess material as needed.
Shop my favorite wreaths below!
How to Make a Flip Flop Wreath (with MacKenzie Childs Tissue Paper)
Step 1. Trace the flip flops
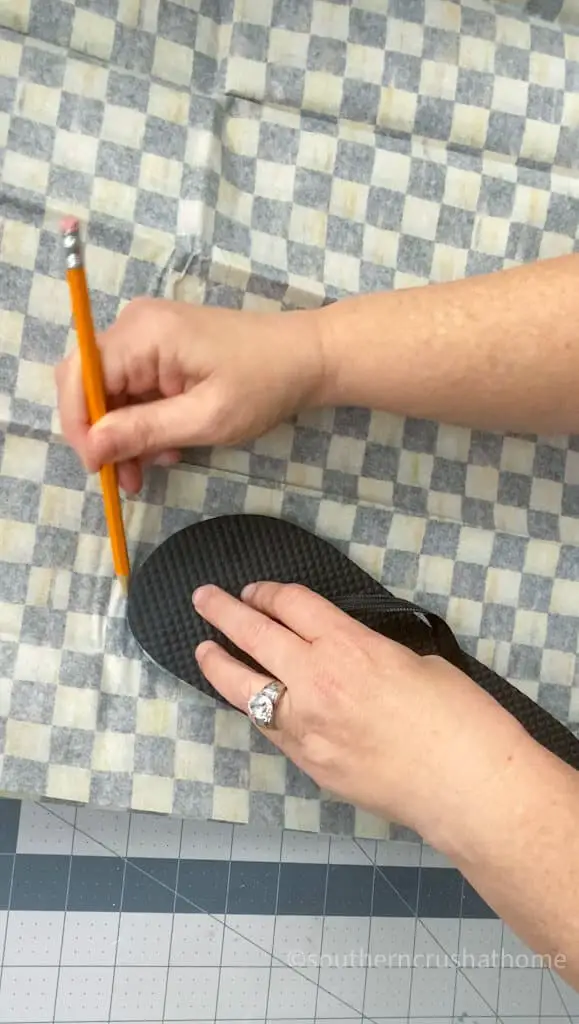
To begin, take a few minutes to carefully place your flip flops on top of the MacKenzie Child’s tissue paper. This will serve as a makeshift template for your project. Make sure to position them accurately, taking note of the shape and size of each flip flop in relation to one another.
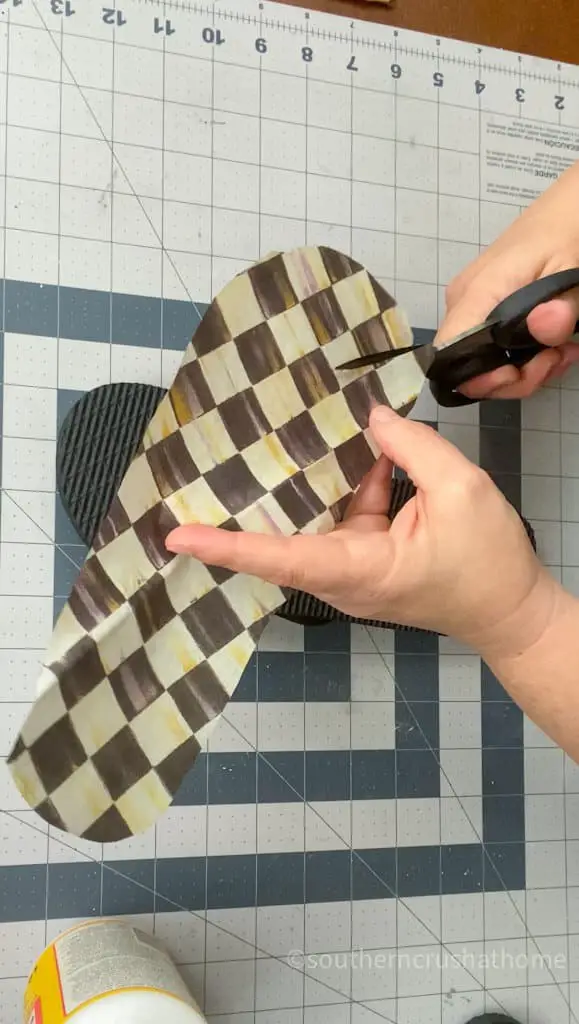
Step 2. Cut out the tissue paper
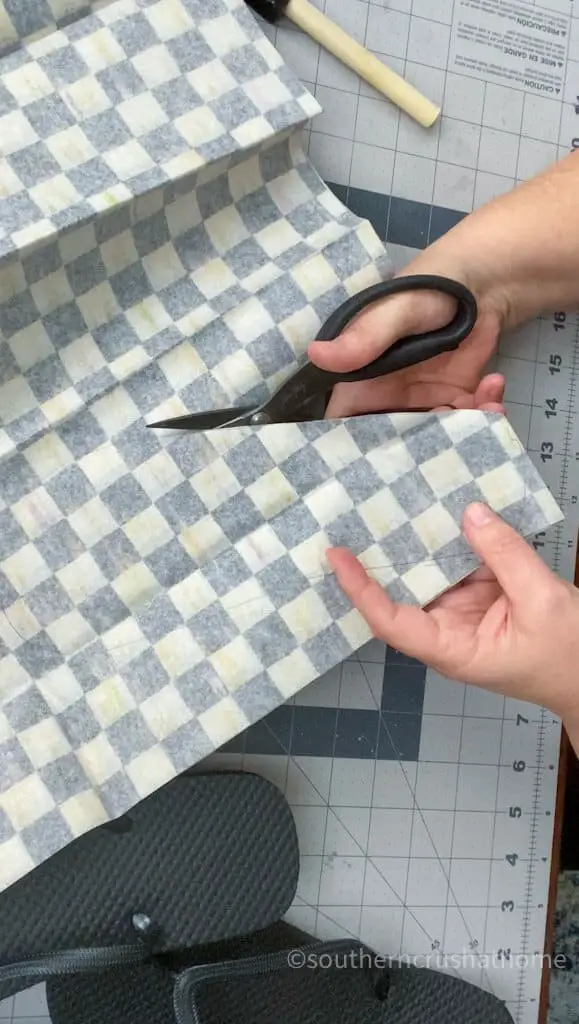
To create custom flip flops, begin by cutting out the individual flip flop templates for each foot, ensuring you have two separate designs – one for the right foot and one for the left. This step-by-step process allows you to tailor your footwear to your personal style and preferences.
Step 3. Mark the center of flip flop
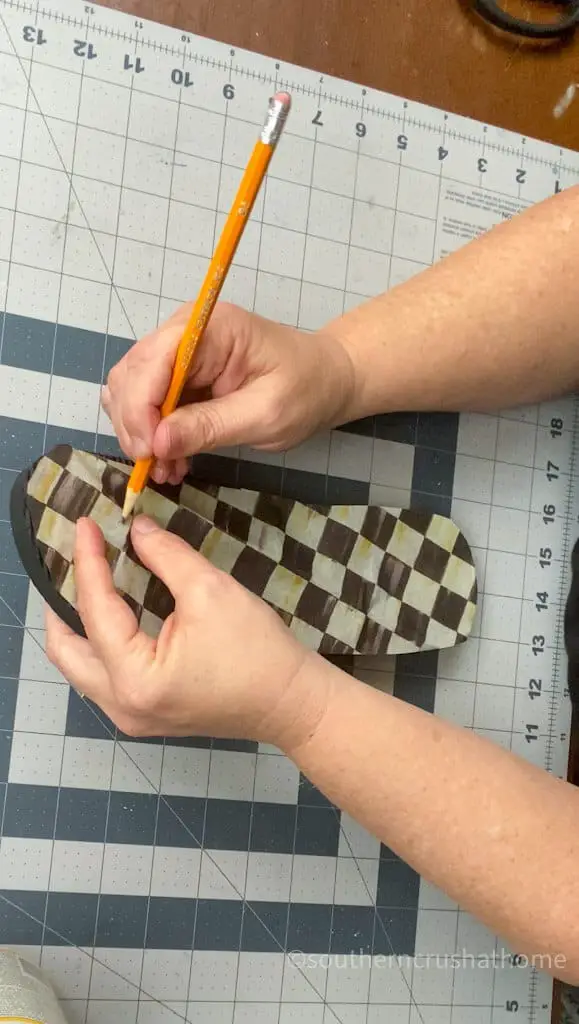
When it comes to identifying the different parts of your flip flops, a simple yet effective approach is to use a pencil to create marks that help you distinguish between the various components. The key is to find the three main sections: the toe post, the strap, and the heel counter. By placing a small mark or dot on each area, you’ll be able to easily visualize where each part begins and ends, making it simpler to perform tasks like tightening or adjusting your flip flops.
Step 4. Cut allowances in the tissue paper
To achieve a seamless transition between the tissue paper and the flip flop thong, simply use your scissors to carefully trim the excess tissue paper to accommodate the shape of the thong.
Step 5. Add mod podge
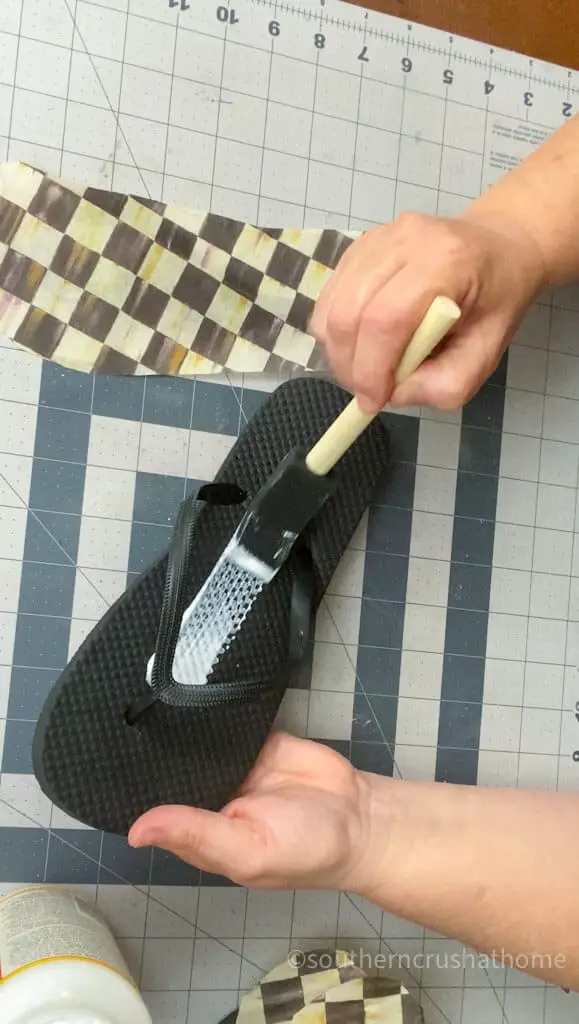
To complete the embellishment, take out your trusty foam brush and apply a generous amount of Mod Podge to the flip flops. This will serve as a strong adhesive that secures the cut tissue paper in place, allowing it to dry and become an integral part of the design.
Step 6. Top Coat with Mod Podge
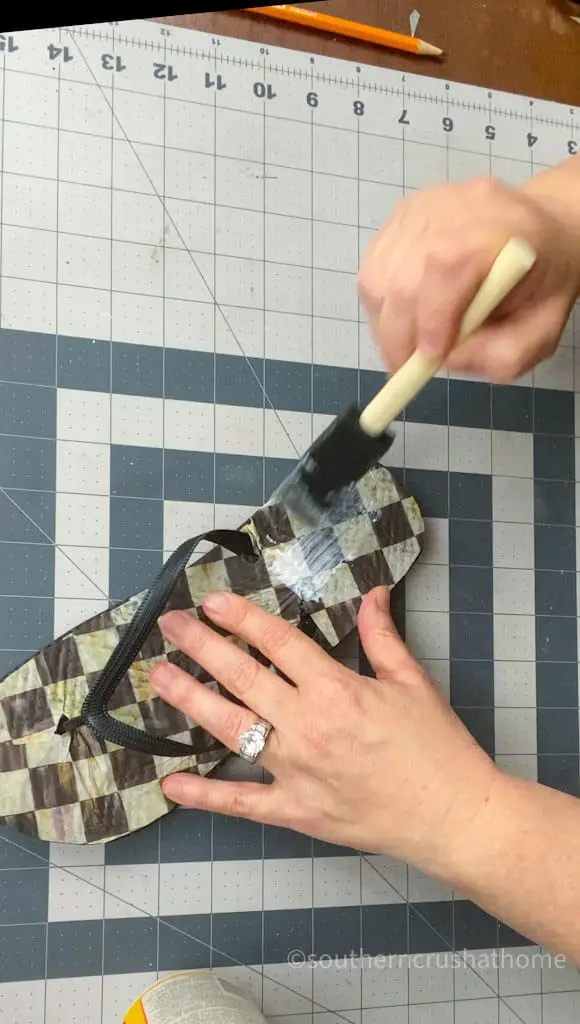
To give your flip flops a unique touch, apply Mod Podge to each tissue paper-covered flip flop using a foam brush. This will help secure the tissue paper in place and add an extra layer of protection against wear and tear.
Step 7. Cover with gold wax
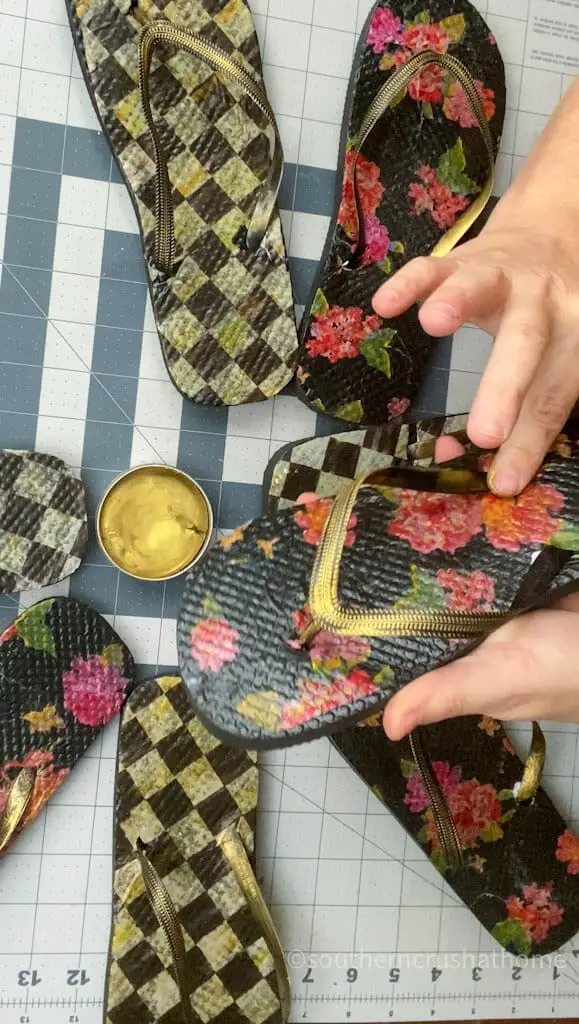
To add a touch of luxury to your MacKenzie Child’s gift, use your finger to gently cover the flip flop thongs with pretty gilded gold wax. Alternatively, you can also apply a thin layer of gold wax along the tissue paper’s creases and folds to emphasize the intricate details. This subtle yet elegant technique will elevate the overall presentation and make it even more special.
Step 8. Hot glue to wreath
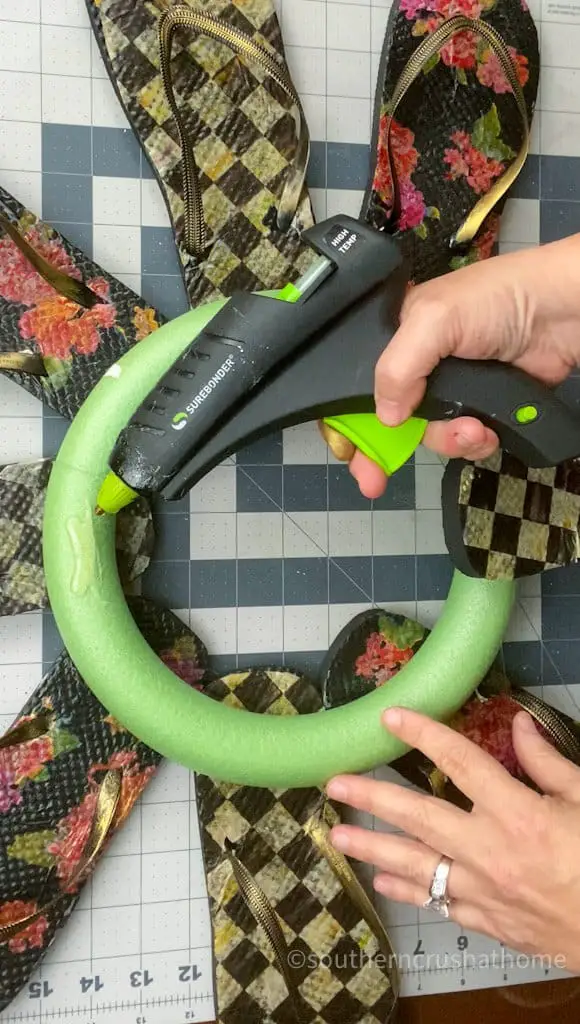
As the final step, secure the covered flip flops to the foam wreath base using hot glue. To achieve a cohesive look, I utilized eight flip flops to fully cover my chosen wreath base.
Step 9. Add a glass plate for weight
When constructing your DIY wreath, take the time to carefully turn it over and attach a glass plate to the rear of the foam base. This simple addition will provide the necessary weight to ensure that your flip-flops remain securely in place.
Step 10. Attach greenery
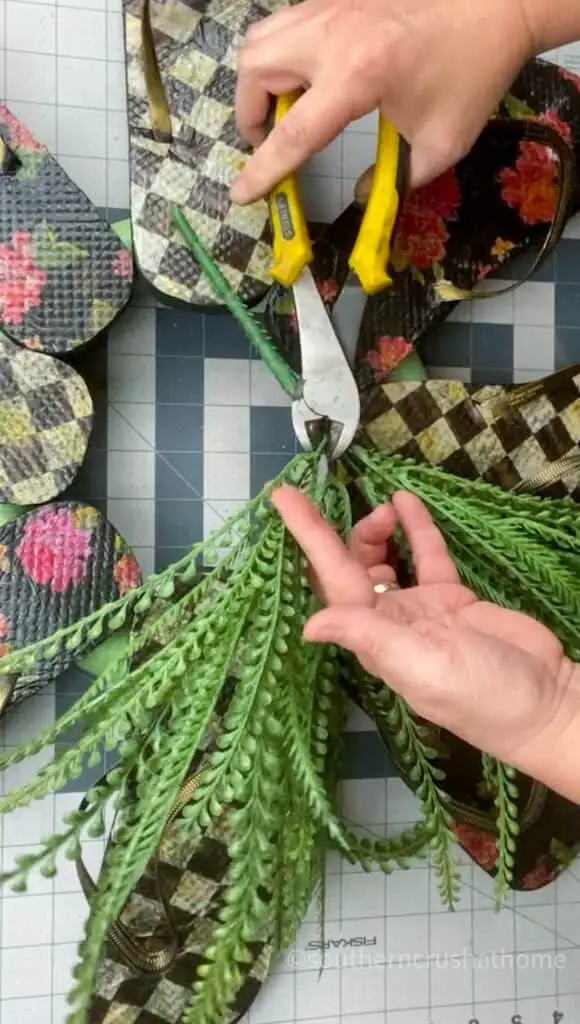
Following the drying process of the adhesive, surround your flip flop wreath with artificial foliage. To achieve a seamless integration, use wire cutters to carefully trim any excess or stray elements from the greenery.
Step 11. Secure the gold mirror centerpiece
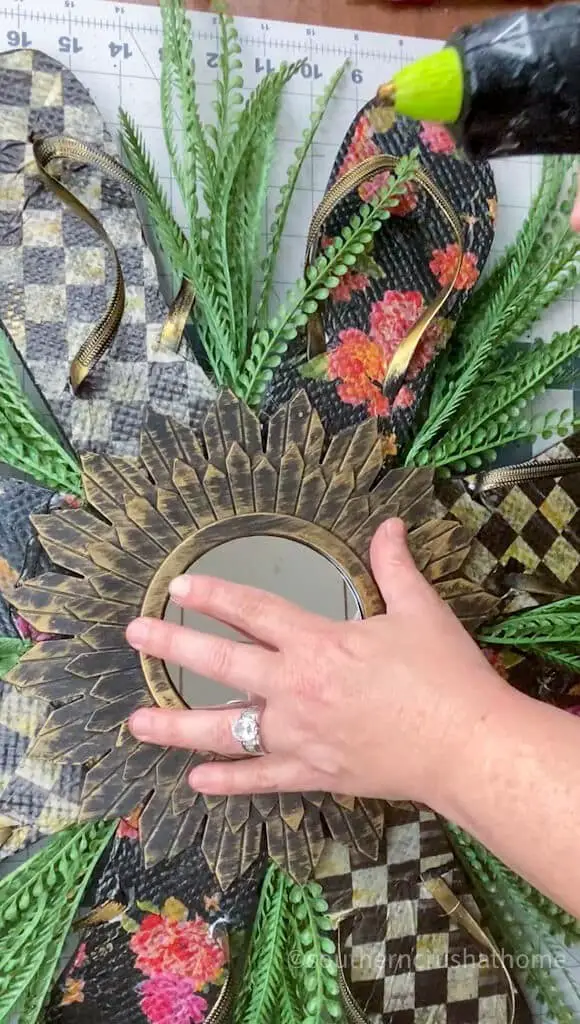
For an added touch of elegance and depth, I placed a small gold and black mirror from Dollar Tree at the very heart of the flip flop wreath. This simple yet thoughtful addition instantly elevates the overall design, drawing the eye towards its shimmering surface.
Step 12. Cover the center with tissue paper
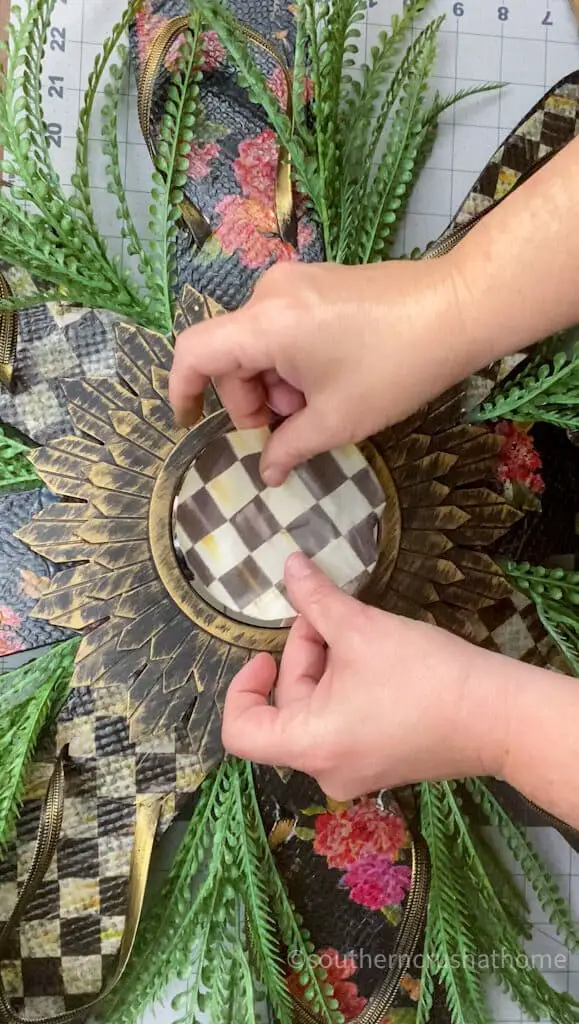
To take the wreath to the next level, I opted for a creative twist. Instead of leaving the mirror plain, I chose to add a touch of whimsy by incorporating a decorative element. This was achieved by cutting a circular piece of tissue paper that matched the size and shape of the mirror’s center. To ensure it stayed in place, I secured the tissue paper with a thin layer of Mod Podge, allowing the adhesive to dry completely before handling the wreath again.
Step 13. Hot glue a wood flower
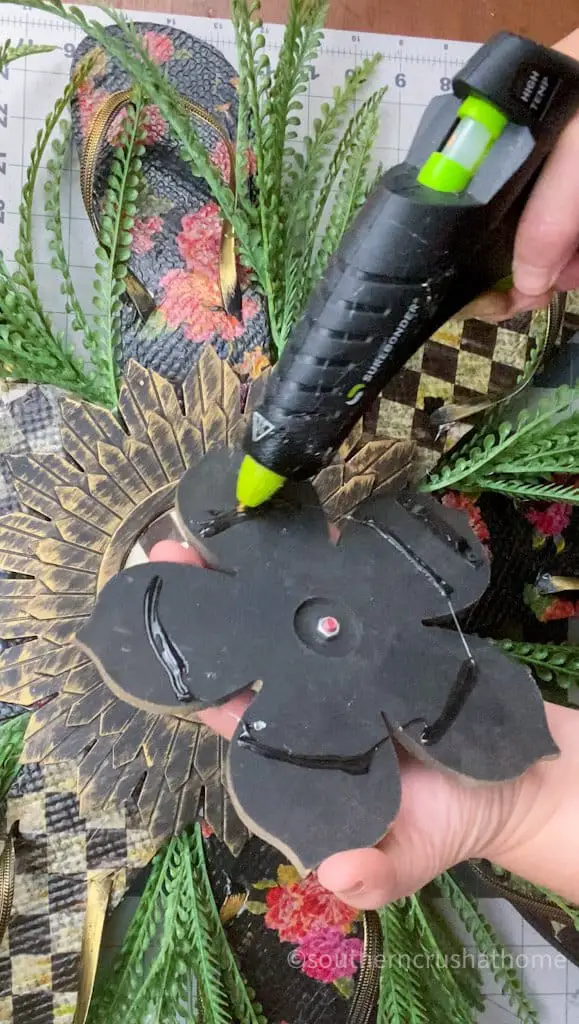
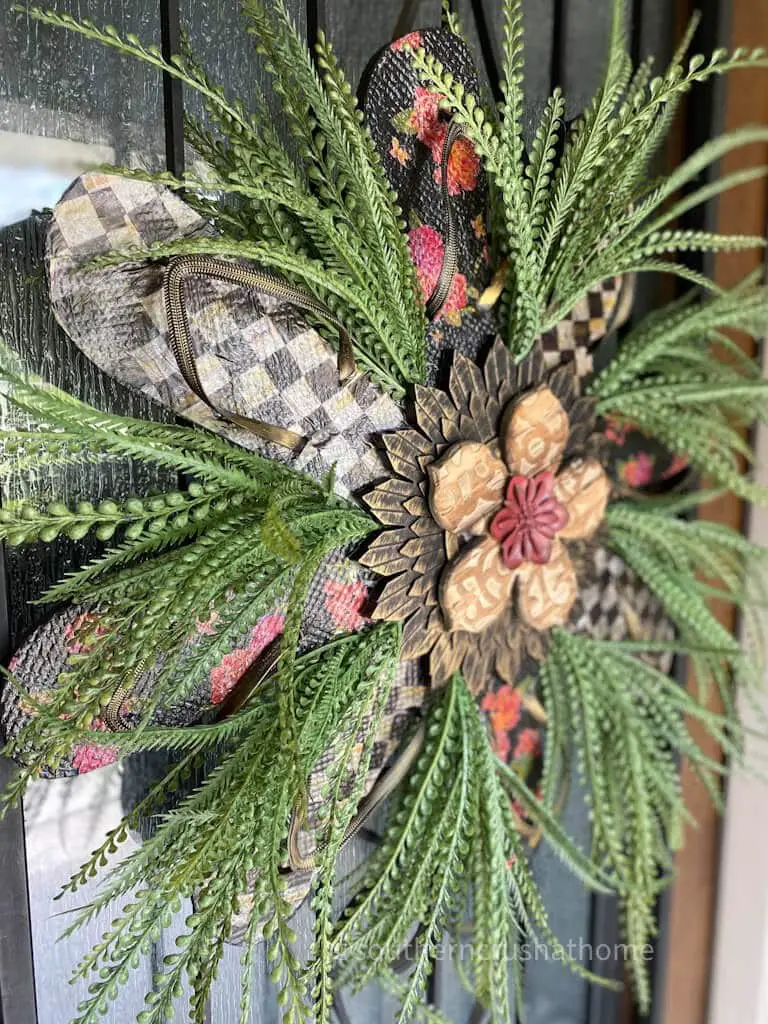
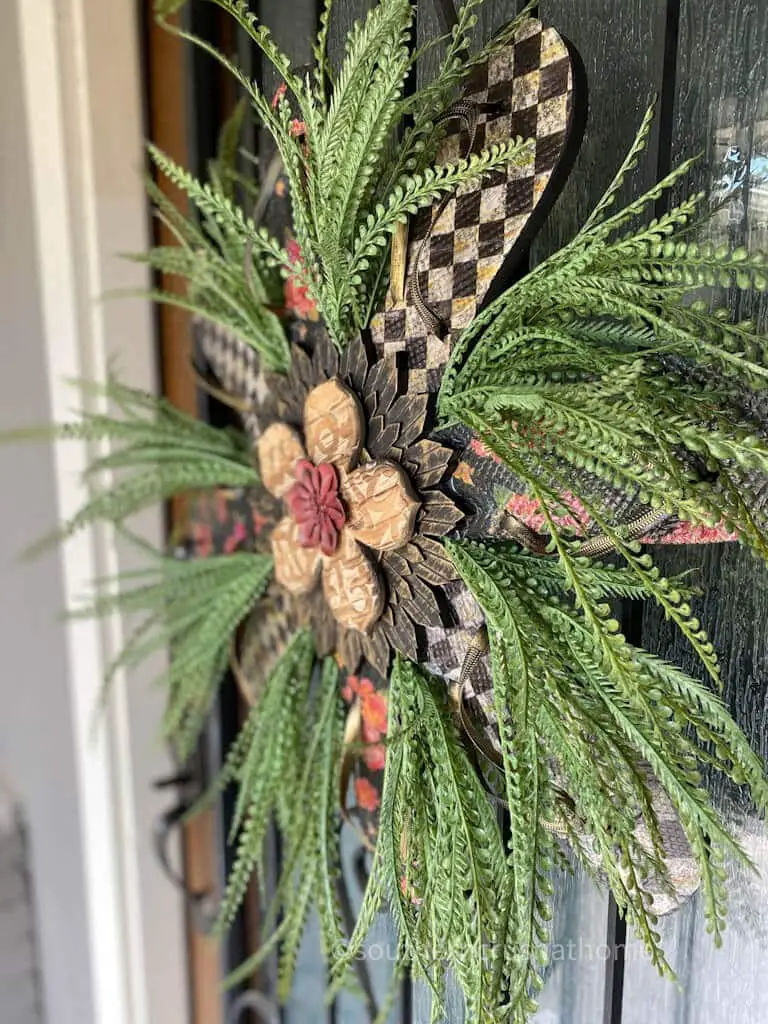
To elevate your handmade wreath, add a decorative touch with a beautiful wooden flower. Secure it in place using hot glue and step back to admire the finished product.
How to Make a Flip Flop Wreath (using MacKenzie Childs tissue paper)
With just a few simple materials, including MacKenzie Childs tissue paper and some basic supplies, you can easily craft this unique wreath in no time. The combination of colorful tissue paper and creative embellishments makes for a stunning summer decoration that’s sure to add a touch of personality to any room.
Equipment
Materials
Creating a unique and festive wreath requires a thoughtful selection of materials. While traditional options like foam or wire forms provide a sturdy base, some crafters prefer to think outside the box. MacKenzie Childs, a well-known brand in the home decor industry, offers a beautiful tissue paper product that can be molded into a stunning wreath form. For a more natural look, consider using greenery like eucalyptus or ferns as your base.
Add some flair with flip flops or wooden flowers for a whimsical touch. If you want to add some extra shine, use glass plates or gold gilding wax to give your wreath a sophisticated finish.
Instructions
To create your unique flip flop wreath, begin by tracing the flip flops onto tissue paper. Once you have your template, cut out a shape for each flip flop. Next, secure the tissue paper to the flip flops using Mod Podge. For added luxury, apply gold gilding wax to each flip flop before moving on to the next step. Now it’s time to assemble the wreath by hot gluing the flip flops to the base of your wreath form. To add some natural charm, surround the flip flops with lush greenery.
Once you have your desired level of coverage, secure an acrylic plate to the back of the wreath using a strong adhesive. For a touch of elegance, hot glue a gold medallion to the center of the wreath. Finally, create a focal point by cutting a circle from tissue paper and attaching it to the center of the wreath with Mod Podge. To complete your piece, attach a beautiful wood flower to the center of the wreath.
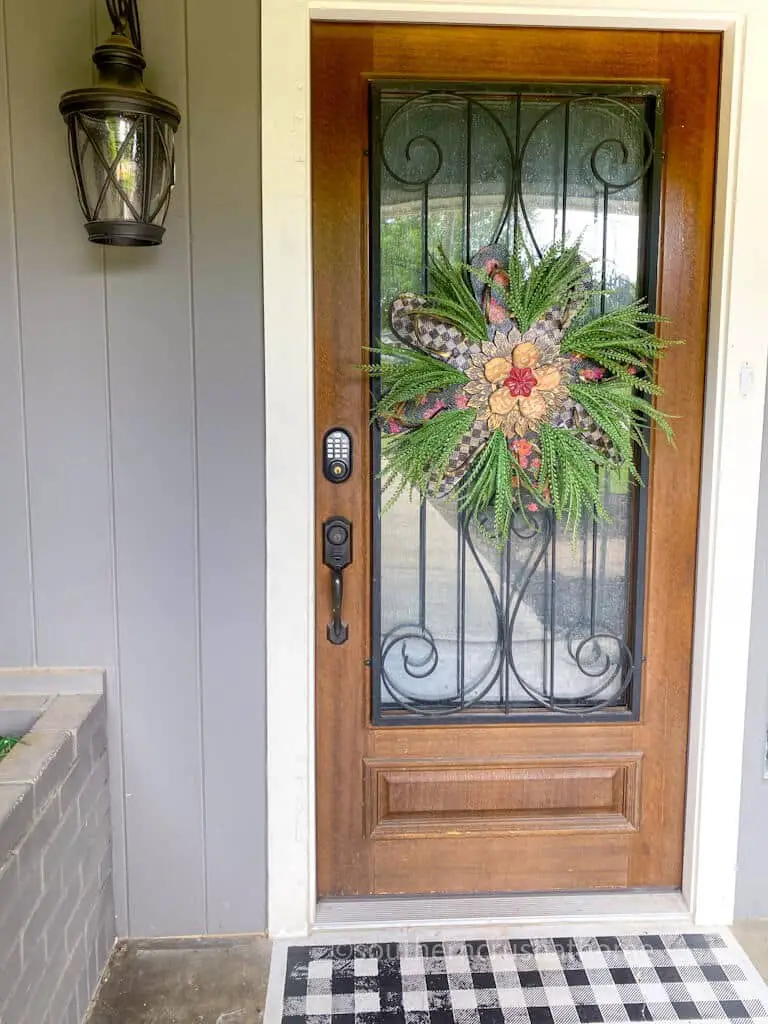
Hang your masterpiece and get ready to enjoy the oohs and ahhs from friends and family.
Wait…see even more DIY summer wreaths here:
Summer is the perfect time to add a touch of warmth and whimsy to your front door with a beautiful wreath. From refreshing lemonade-inspired designs to playful farmhouse-style creations, there’s a summer wreath out there for everyone. One stunning option features a sun hat as the focal point, while another uses dollar-store ping pong balls to create a showstopping entrance.
Whether you’re going for elegant or eclectic, these gorgeous summer wreaths are sure to bring a smile to your face and a splash of color to your front porch.