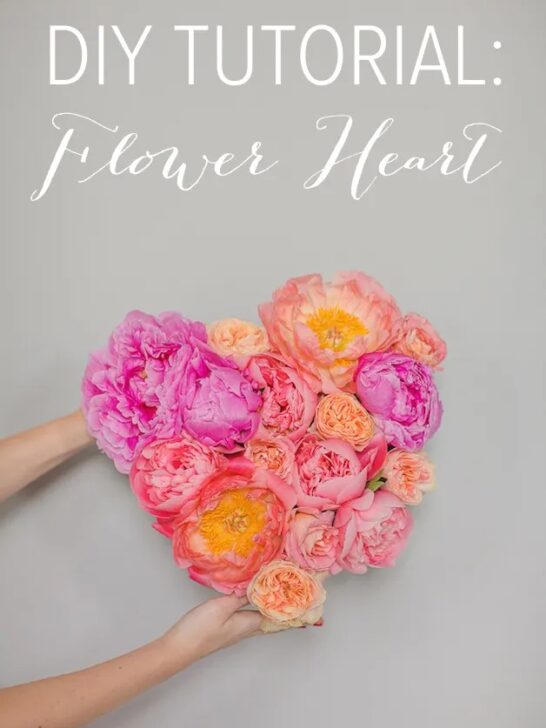
As the excitement around Valentine’s Day builds, we’re delighted to share another creative project that’s sure to bring a touch of romance to your celebrations. In collaboration with Marianne Taylor Photography and Louise Beukes Styling, we crafted a stunning DIY Fresh Flower Heart as part of our Bridal Musings Photoshoot last year. This gorgeous piece is too pretty not to try at home! The possibilities are endless – use it as a centrepiece for your Valentine’s Day dinner, as a unique wedding decoration, or even create a thoughtful gift by replacing the fresh flowers with a bouquet for Mother’s Day. Faux flowers can also be used to give it an alternative look, and you can try scaling up the design to create a breathtaking ceremony backdrop. This DIY project is a perfect blend of beauty, impact, and ease, making it our kind of creative endeavour.
What You’ll Need:
As one ventures into the serene Heart Shaped Oasis, a kaleidoscope of colors greets them. The landscape is painted with an assortment of blooms, each one unique and captivating in its own right. But it’s not just the beauty of nature that catches the eye – a pair of scissors lies nestled among the petals, a subtle yet intriguing addition to this picturesque scene.
How To Make a DIY Flower Heart:

Gather Your Tools
When it comes to creating a unique and visually appealing floral arrangement, consider combining peonies, David Austin Roses, Cabbage Roses, or Carnations for a lush look. Alternatively, you could experiment with smaller blooms or more rustic styles to add some texture and interest. For the base of your arrangement, opt for heart-shaped oasis products, which can be easily sourced online or at specialty florists or flower markets.
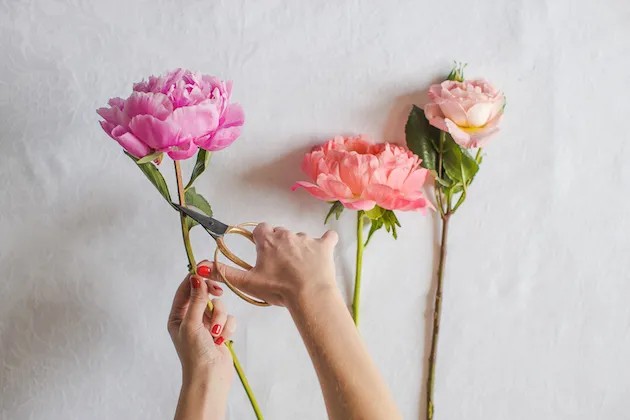
Trim Your Stems
Trim your succulent stems to approximately three inches from the crown, ensuring they comfortably nestle within the potting medium without protruding beyond the rim.
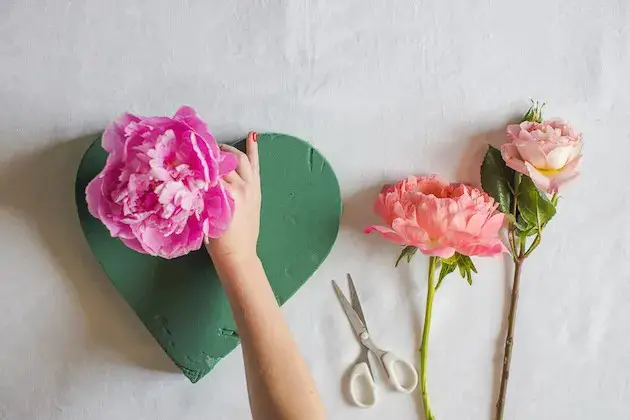
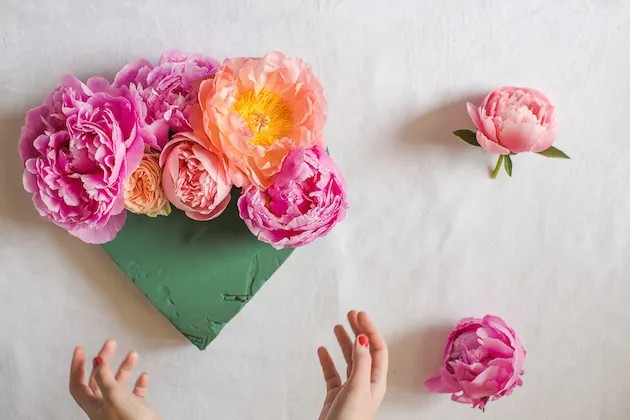
Place The Blooms
As you start arranging your blooms, begin by placing the largest flowers first to establish the overall silhouette. Be mindful not to touch the delicate petals, instead gently grasp the stems to avoid causing any damage or discoloration.
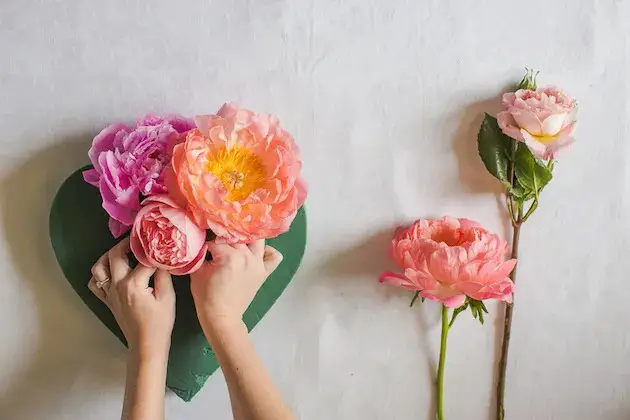
Build Up Your Heart
As you construct your floral arrangement, begin by carefully placing each bloom directly adjacent to its neighbor, ensuring a snug fit throughout. This deliberate approach will yield a more cohesive and visually appealing display when compared to scattering them randomly. Start at the uppermost portion of the composition and work your way down, taking care to maintain a consistent level of proximity between flowers.
Keep It Consistent
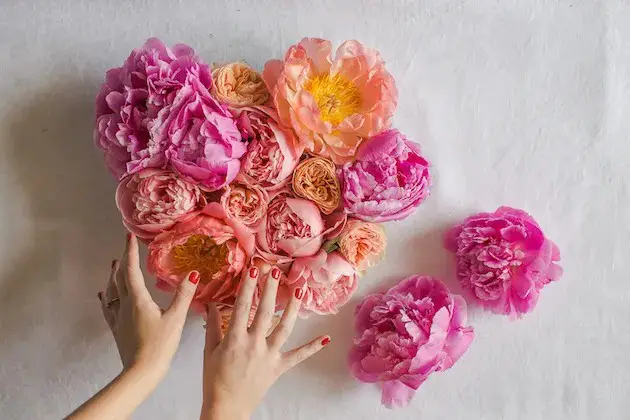
When incorporating multiple colors and sizes into your design, take a moment to ensure a balanced distribution across the composition’s central area. This visual harmony will create a more cohesive and aesthetically pleasing outcome.
Fix in Place
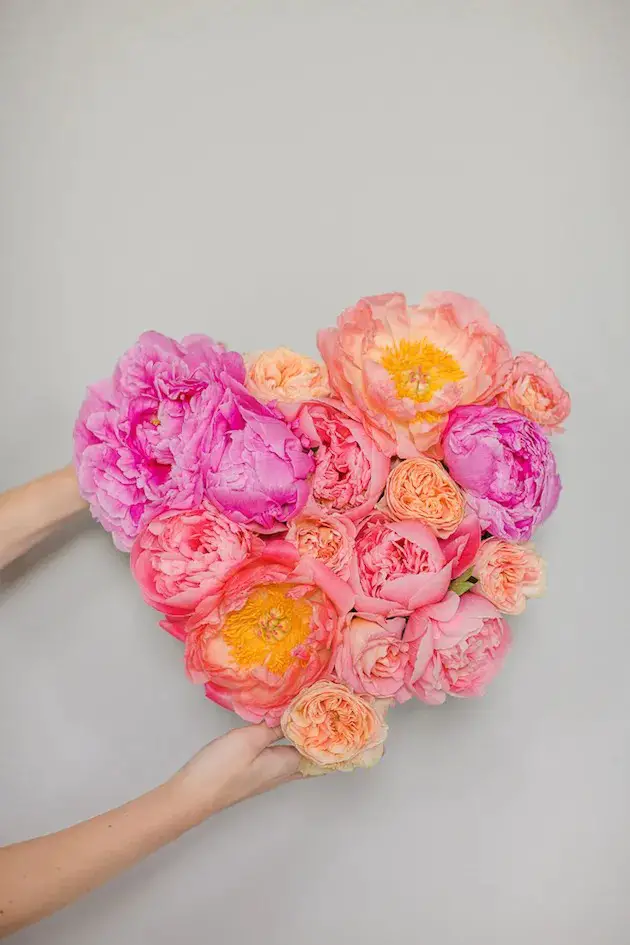
Adjusting the placement of the flowers is crucial in creating a visually appealing arrangement. Gently manipulate any bunches or puckered flowers to achieve an even distribution. You may need to make some minor adjustments at the top to perfect the curve, aiming for a classic heart shape. Once satisfied with the overall appearance, your fresh flower heart is now ready to be admired.
Pin This Nifty Step-by-Step To Have Forever
As you consider bringing the elegance of candlelight into your own space, whether it’s to commemorate a special occasion like Valentine’s Day or as a thoughtful gift for someone dear, we invite you to get creative and try this beautiful DIY project with us. We’re grateful to Marianne Taylor Photography and Louise Beukes Styling for their expert collaboration in bringing this lovely tutorial to life.